


Get Advanced Insights on Any Topic
Discover Trends 12+ Months Before Everyone Else
How We Find Trends Before They Take Off
Exploding Topics’ advanced algorithm monitors millions of unstructured data points to spot trends early on.
Keyword Research
Performance Tracking
Competitor Intelligence
Fix Your Site’s SEO Issues in 30 Seconds
Find technical issues blocking search visibility. Get prioritized, actionable fixes in seconds.
Powered by data from
Latest Blog Posts
Featured Case Studies
See what's trending before everyone else
Each week, we'll send you our best Exploding Topics. Plus, expert insight and analysis.
How to Auto-Generate Content Ideas in Asana with Exploding Topics

 Add Exploding Topics on GoogleAdd Exploding Topics as your preferred source to see more of our stories on Google.
Coming up with new topics to write about sounds simple enough, but has long been one of the most time-consuming and difficult tasks for content marketers. Auto-generating content ideas with help from LLMs offers significant help in this area, but has its drawbacks.
AI isn’t always reliable when it comes to accuracy and often doesn’t have the right data to draw from to suggest topic ideas that will resonate with your audience.
My alternative solution? Pair Exploding Topics and Zapier to deliver data-backed content ideas directly to your content calendar in Asana. This setup provides all the convenience of automation with the reliability of Exploding Topic’s trend data.
In this tutorial, I’ll show you exactly how to auto-generate content ideas in Asana using Exploding Topics and Zapier.
How to Auto-Generate Content Ideas in Asana With Exploding Topics
In order to recreate the auto-generated Asana content calendar in this post, you’ll need access to the following platforms:
- Asana (free or pro will work, but you’ll need pro to follow the steps exactly as they appear here)
- Exploding Topics Pro with API access
- Zapier Pro (required for multi-step workflows)
Once you’ve created all your accounts, dive into Step 1.
Optional: Create Your Zapier Workflow With Copilot AI
Zapier provides access to its Copilot AI workflow builder, which you can use to conversationally ask for the workflow you want to create. I’ve tested it out myself, and it’s pretty impressive how much time it can save you.
In this tutorial, I’m going to share manual setup steps for users who want to build their Exploding Topics–Asana workflows themselves, and also to show my settings so you can compare your AI-generated settings for troubleshooting purposes if needed.
If you want to use Copilot to build your workflow to auto-generate content ideas in Asana, just enter your prompt in the Copilot chat box when you first open the Zapier workflow builder.
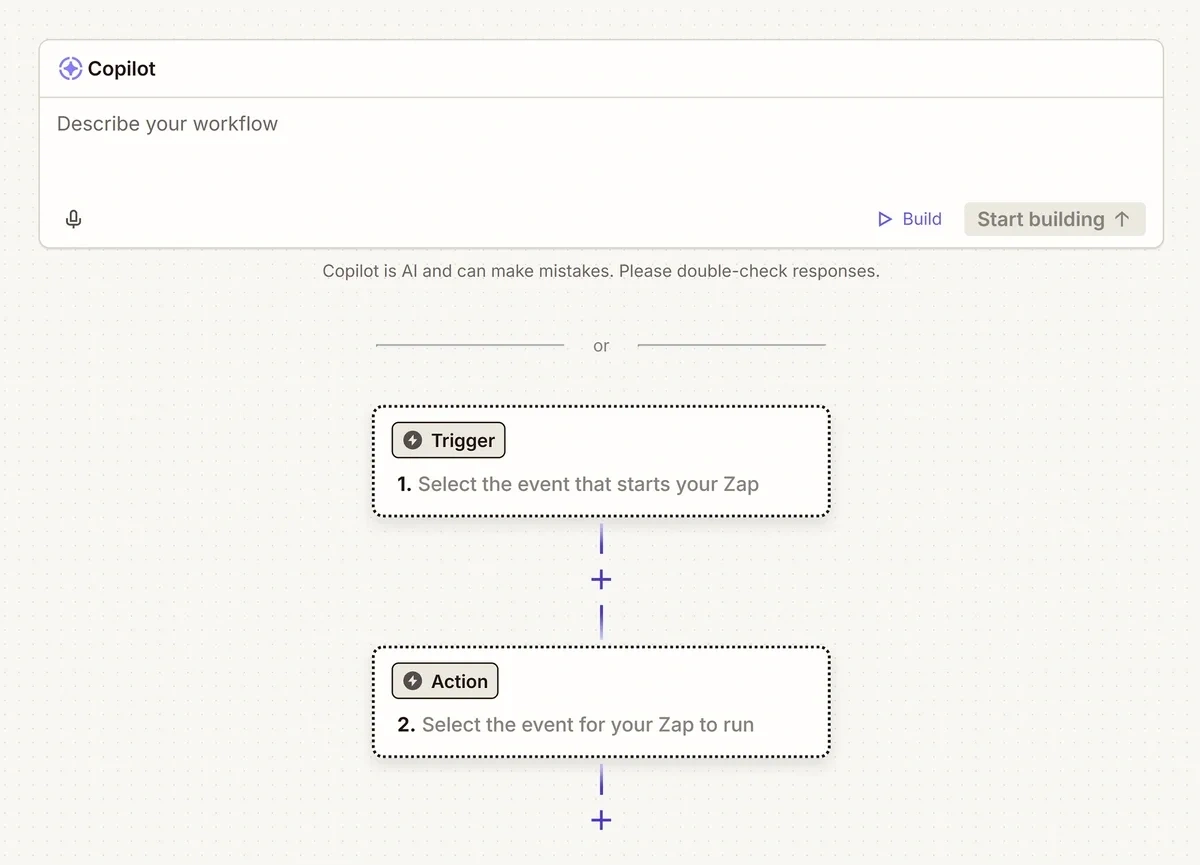
Or click Build it at the top of the workflow builder at any point during the workflow building process to access Copilot AI.
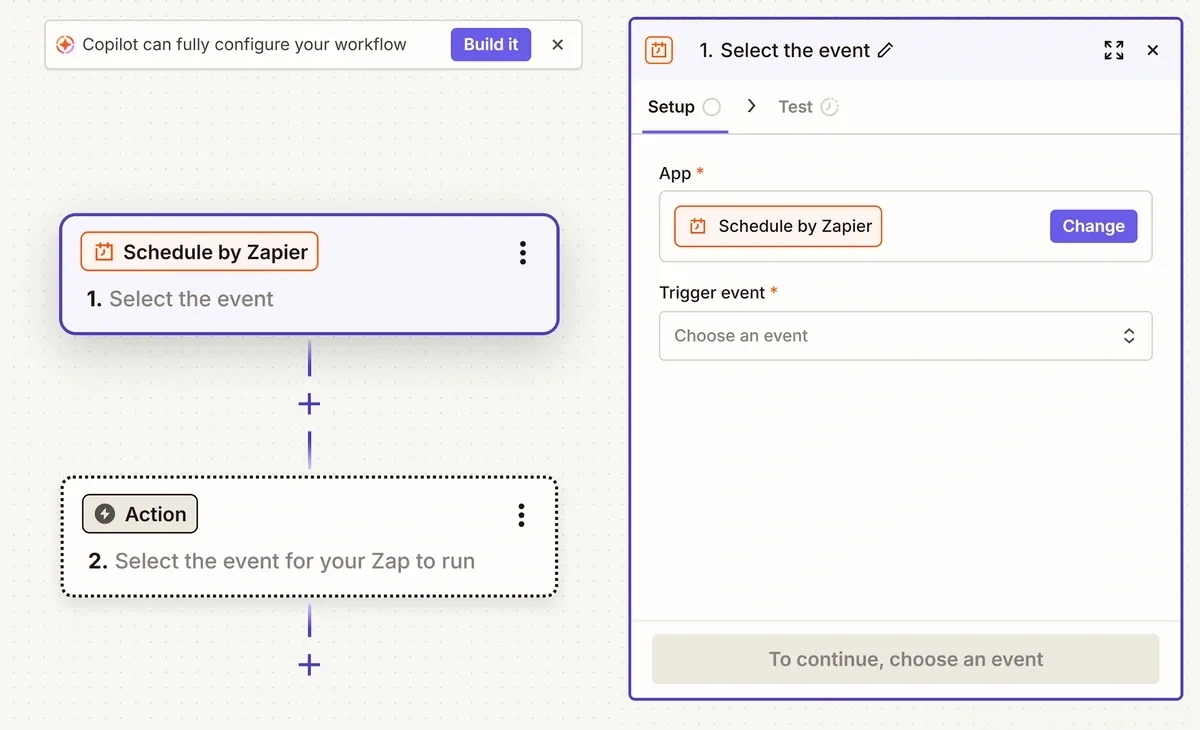
Keep in mind, you’ll still need to have your Asana content calendar set up and provide your credentials for both Asana and Exploding Topics for the connection to work.
Check out the steps below for guidance in both areas.
Step 1: Create an Asana Project and Content Task Template for Your Content Calendar
If you don’t already have an existing setup for your content calendar in Asana, you’ll want to create a new project to house it.
To create a new project, click on the Create Project link on your home screen or select Create » Project in the top left corner.
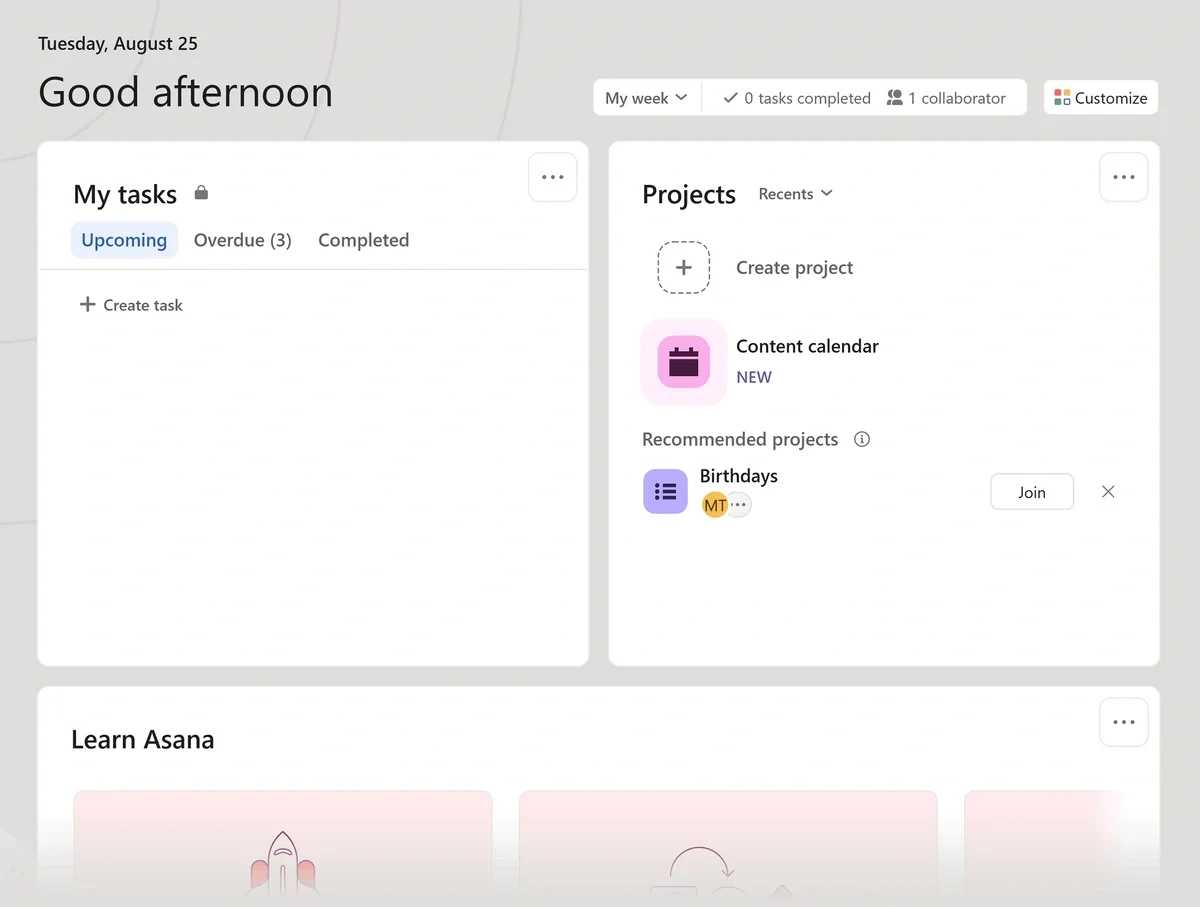
Asana offers several project templates, including multiple options for content calendars if you’d like some help setting yours up.
If you have a paid plan, I also recommend creating a task template to use with your Zapier workflow. You can use a blank task instead, but building a content-specific template will save you some time filling in additional repetitive details later in the process.
To create a task template, open your content calendar project and click on Customize in the top right corner.
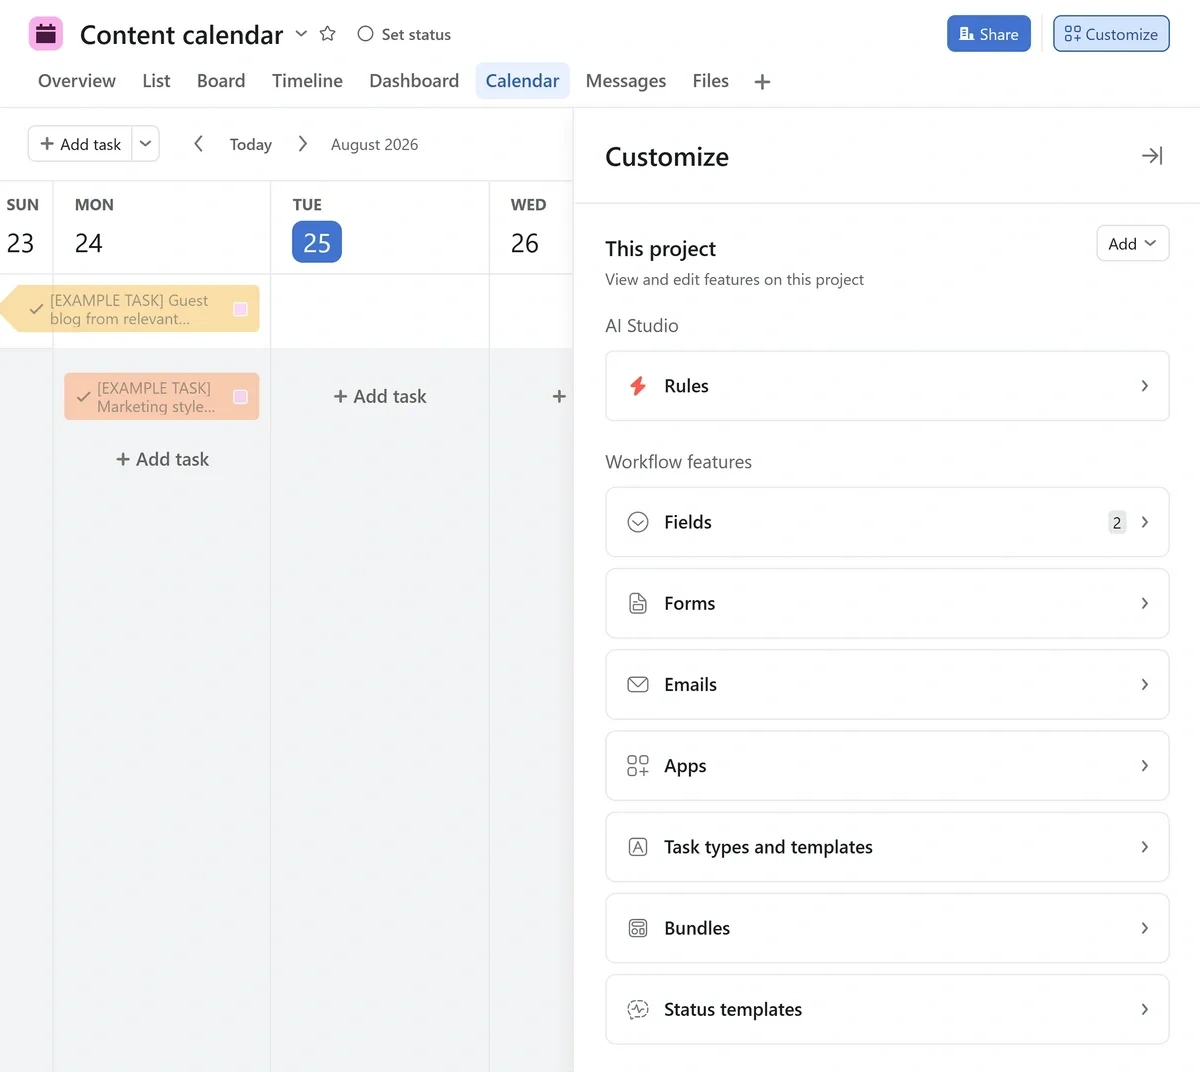
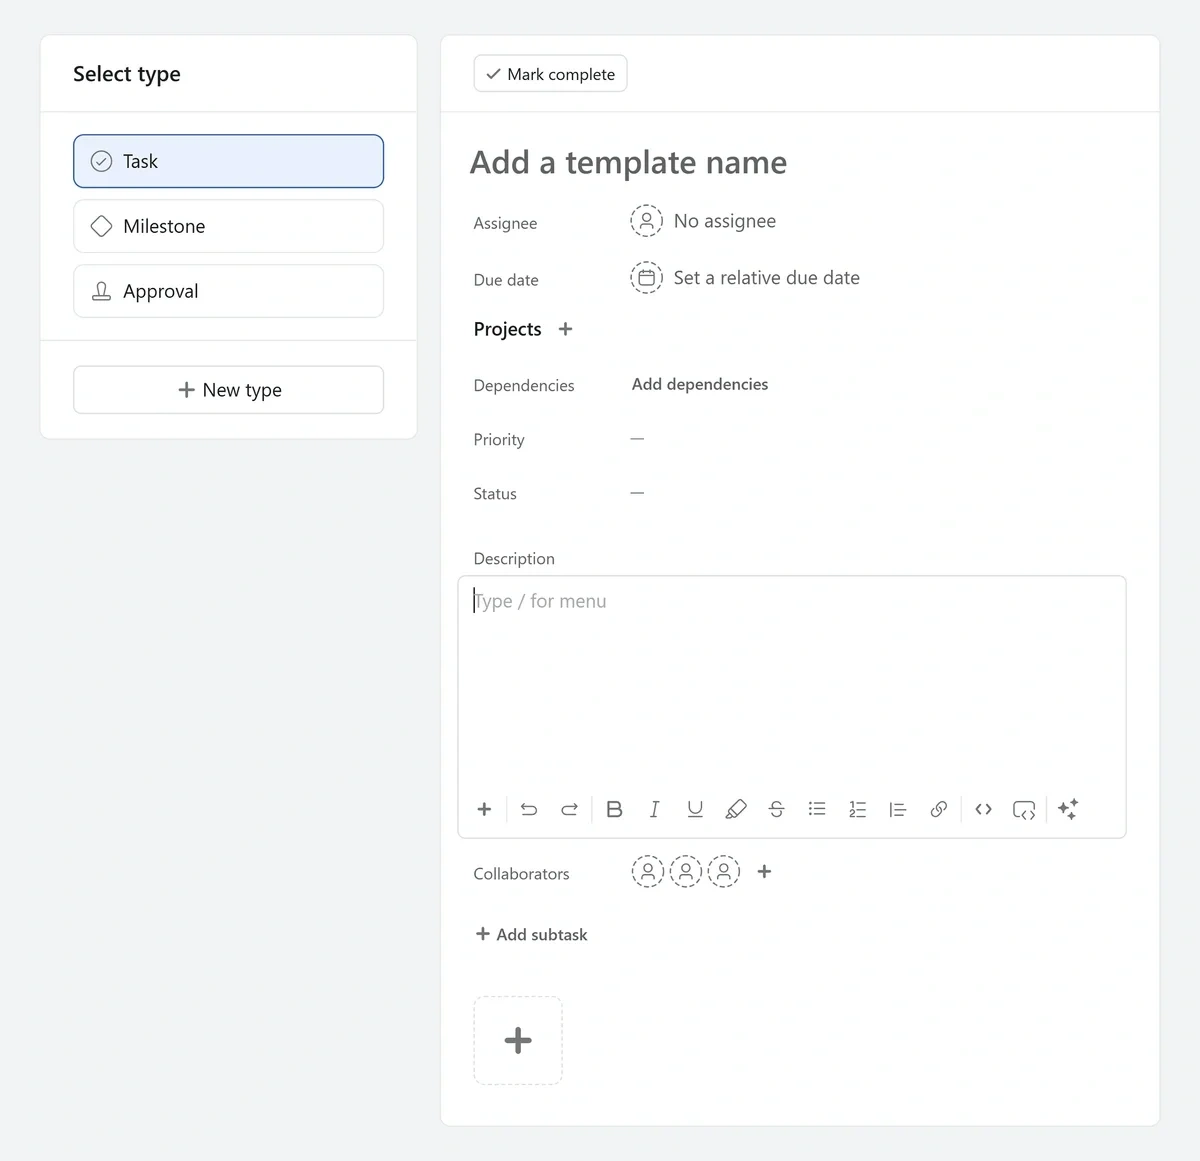
Select Task types and templates » Task » Templates » Add template. This will open the task template editor.
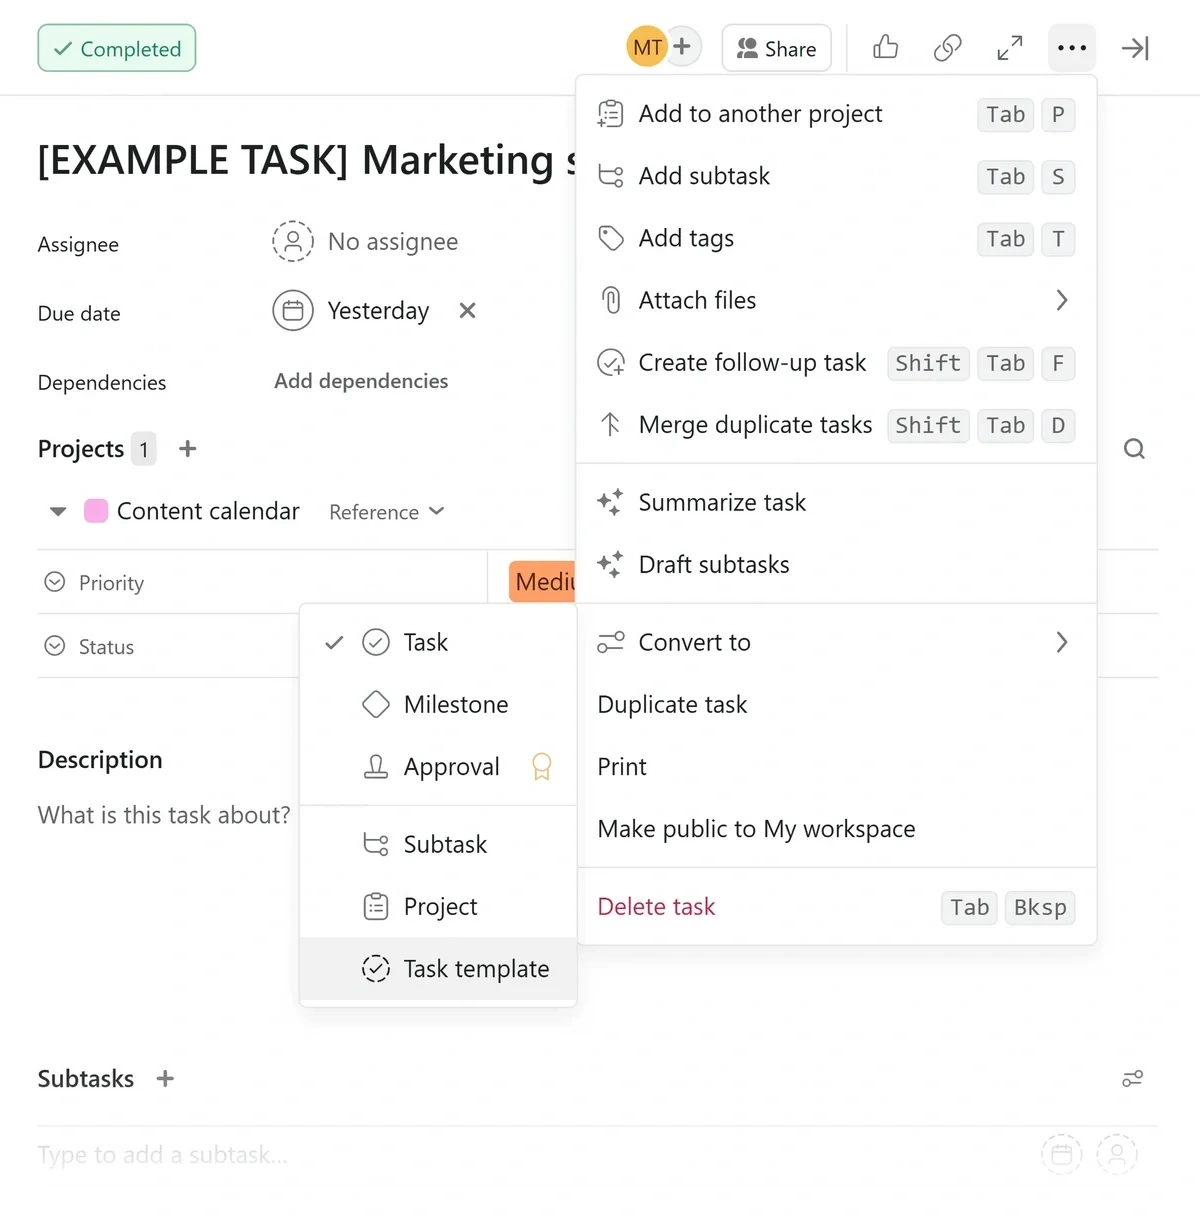
You can also convert an existing task into a template by opening the task, clicking on the three-dot menu in the top right corner, and selecting Convert to » Task template.
I included a Status field in my template task with a “Needs Review” option that I can use to keep track of which topics I’ve reviewed after Zapier adds them to Asana. You might also consider adding fields for key metrics like growth or keyword difficulty.
Step 2: Set Up Your Zapier Workflow Schedule
Once your Asana project is prepped, it’s time to head over to Zapier.
Click Create » Zap workflows.
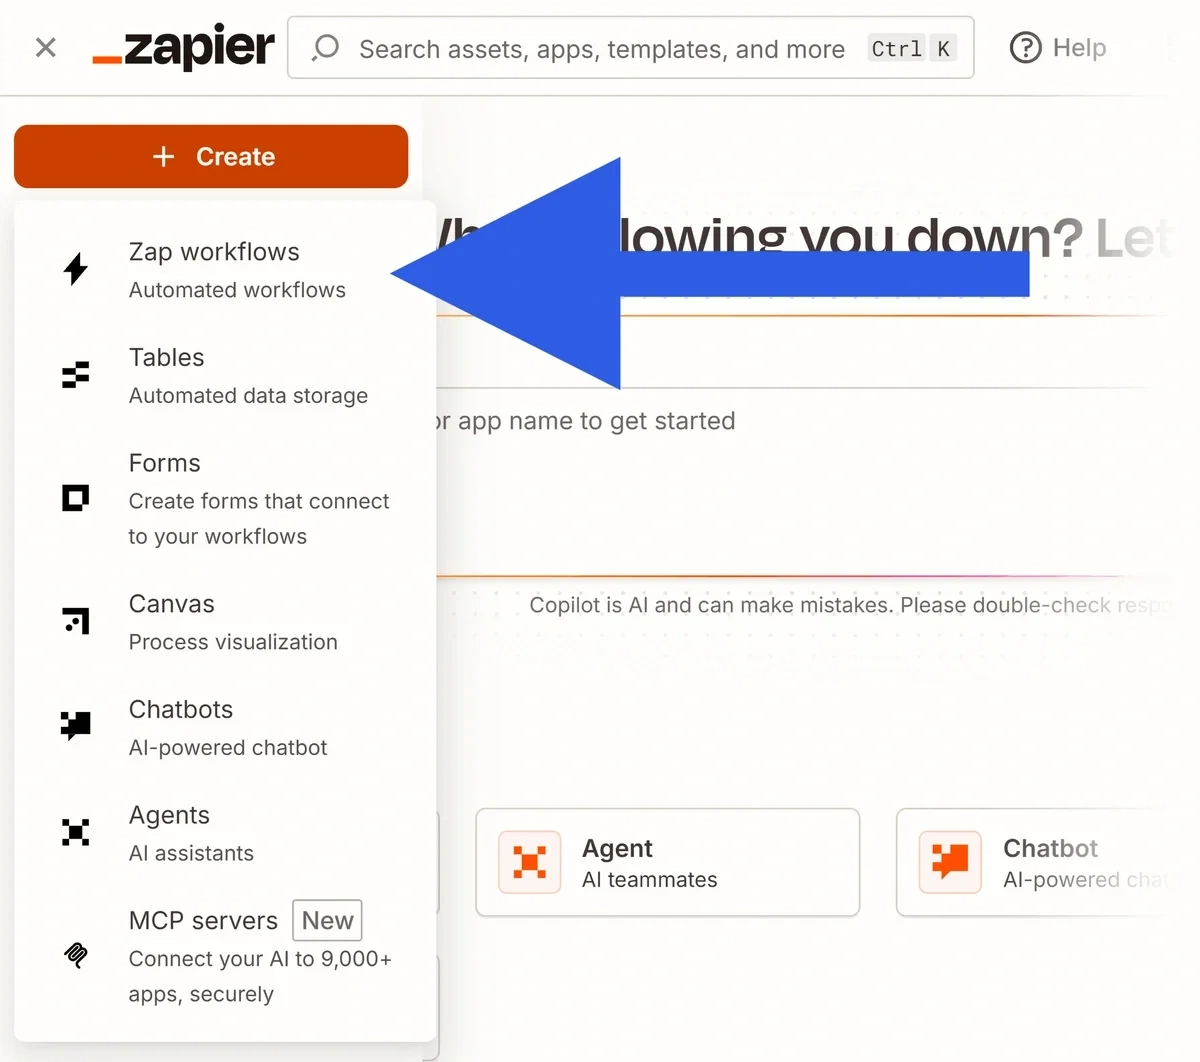
This will open the Zapier workflow builder. Here’s where you’ll connect Exploding Topics to Asana.
First you need to set up Exploding Topics as your trigger app. Click on the Trigger box.
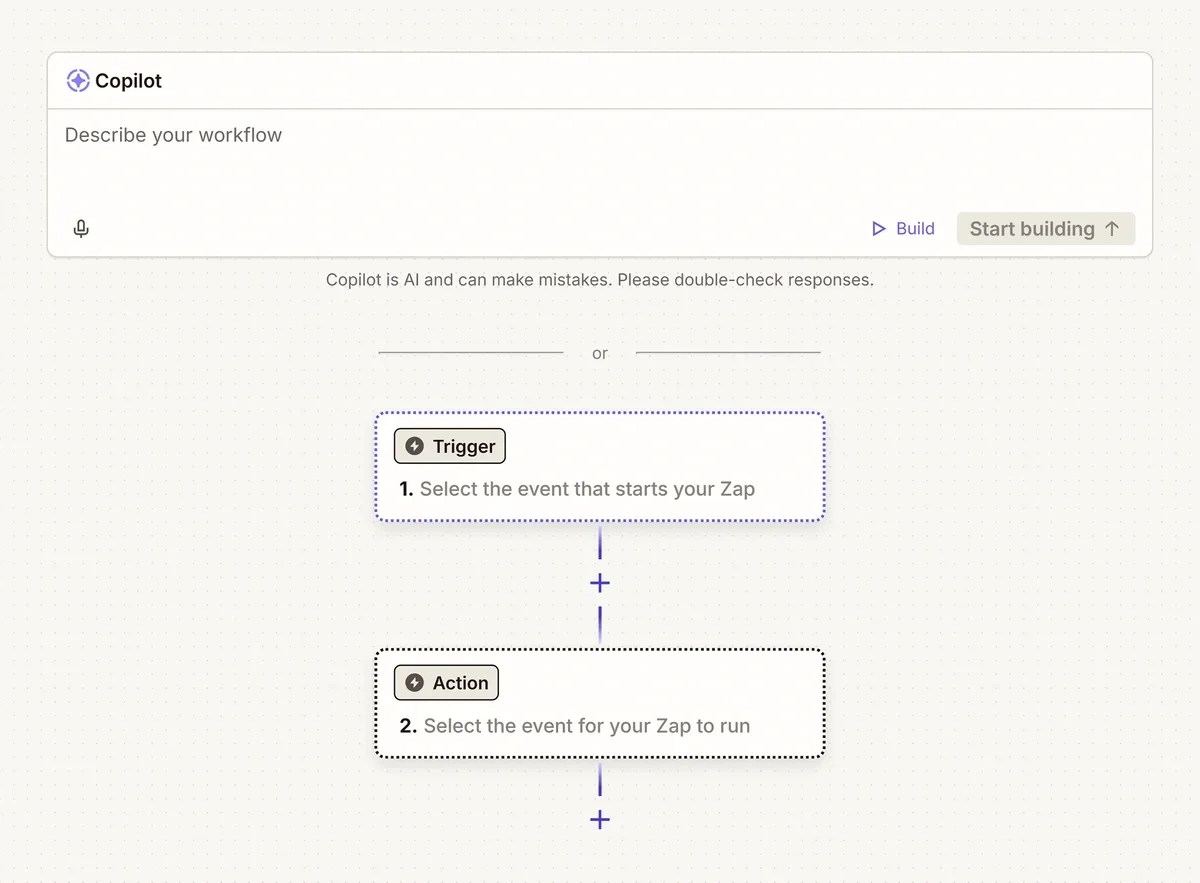
The Exploding Topics Zapier app is still in Beta, so you need to take a couple extra steps to access it. Click Browse All in the top right corner of the popup.
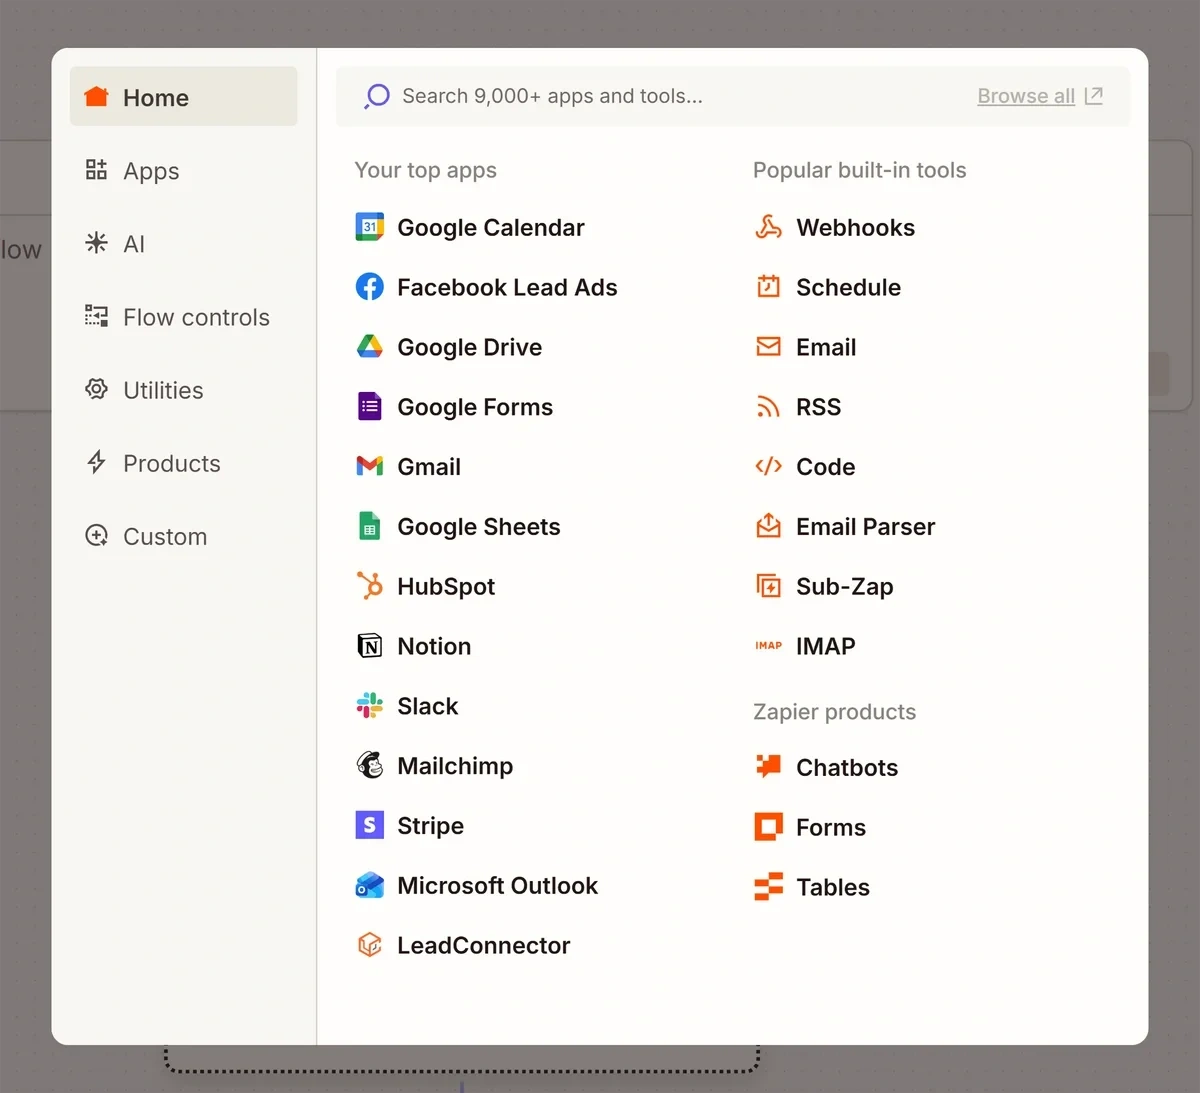
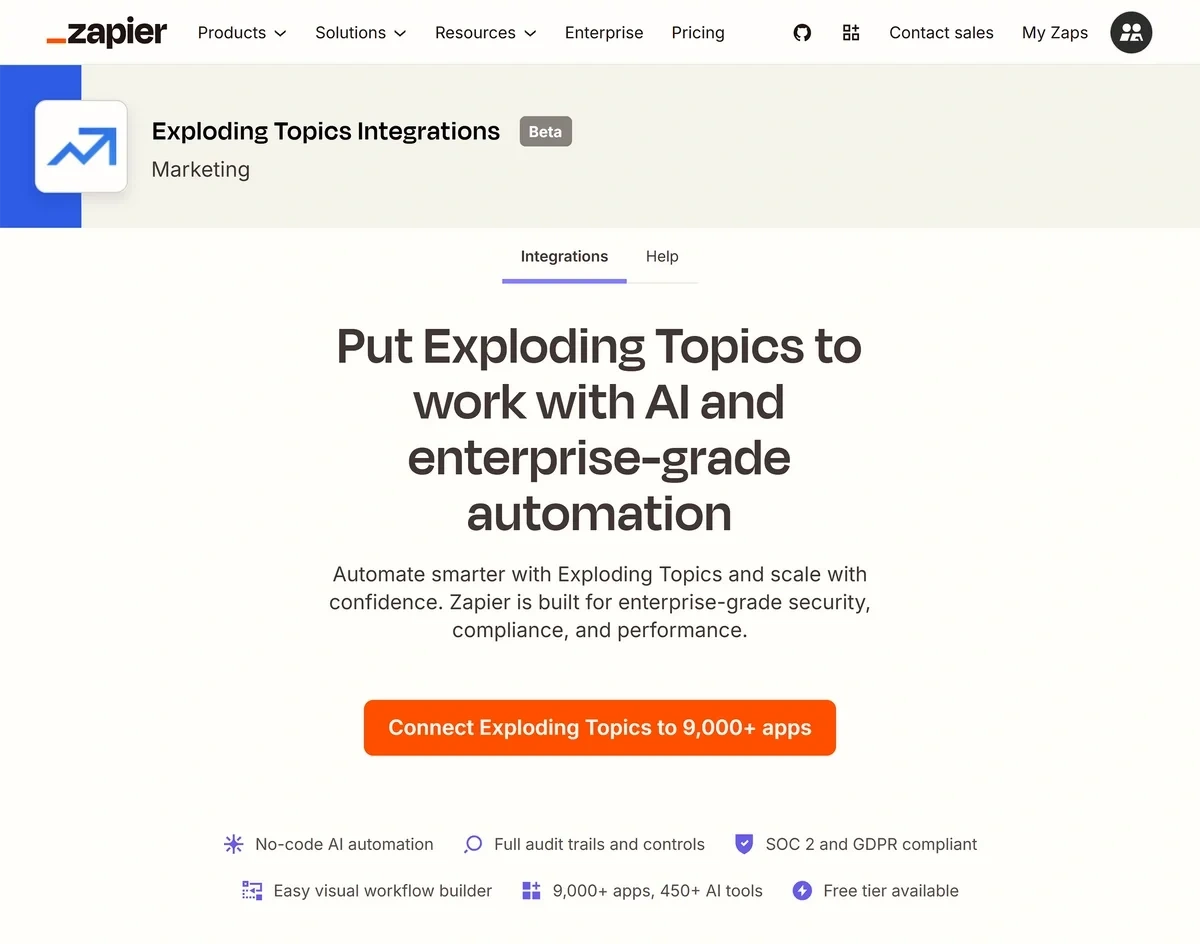
Then search for Exploding Topics on the next page.

Finally, click Connect Exploding Topics to 9,000+ apps.
This will take you back to the Zapier workflow builder so you can set up the schedule that will act as the trigger for your workflow.
All Exploding Topics action events in Zapier are required to run on a schedule. This means the workflow kicks off automatically at a set time, rather than initiating when something specific happens in another app.
Click on the box in the workflow builder labeled Schedule by Zapier, then select a frequency from the Trigger event dropdown.
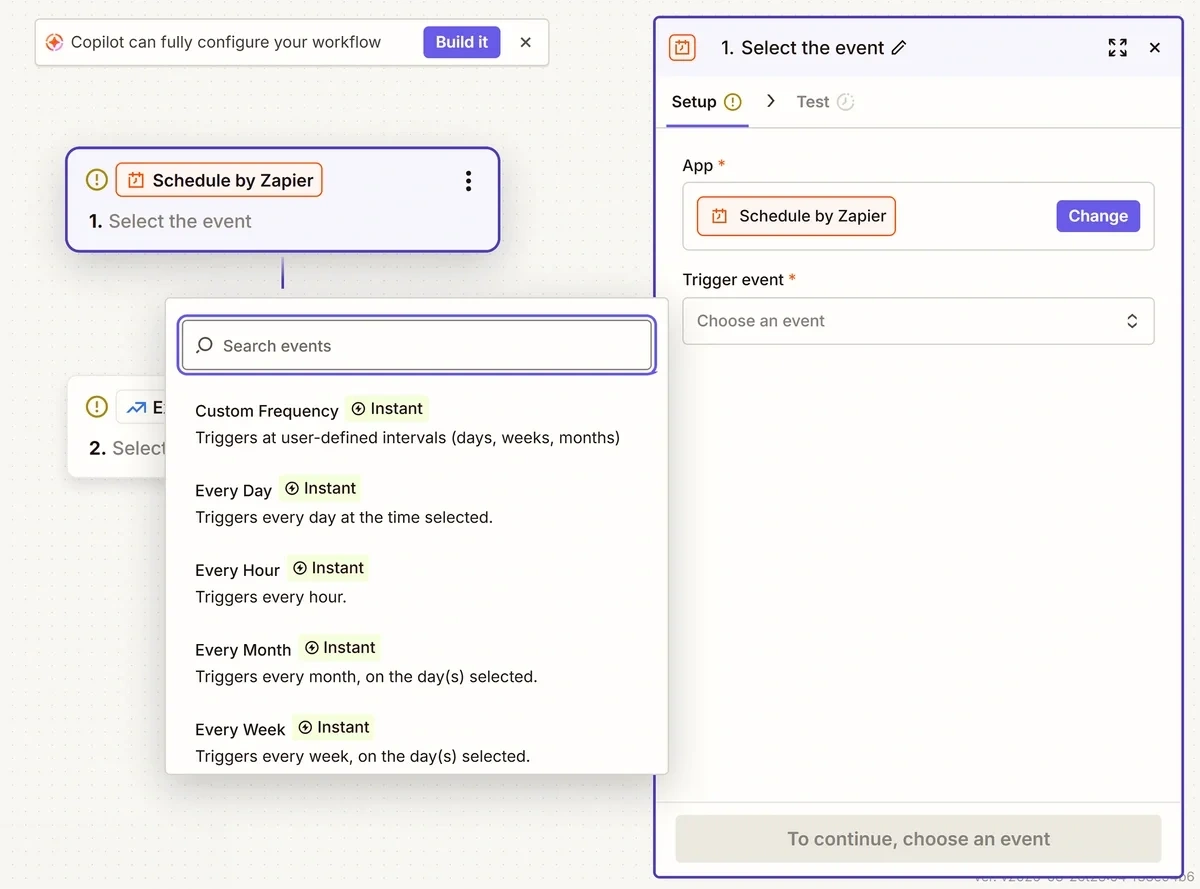
Click Continue and answer the follow up questions in the configuration panel.
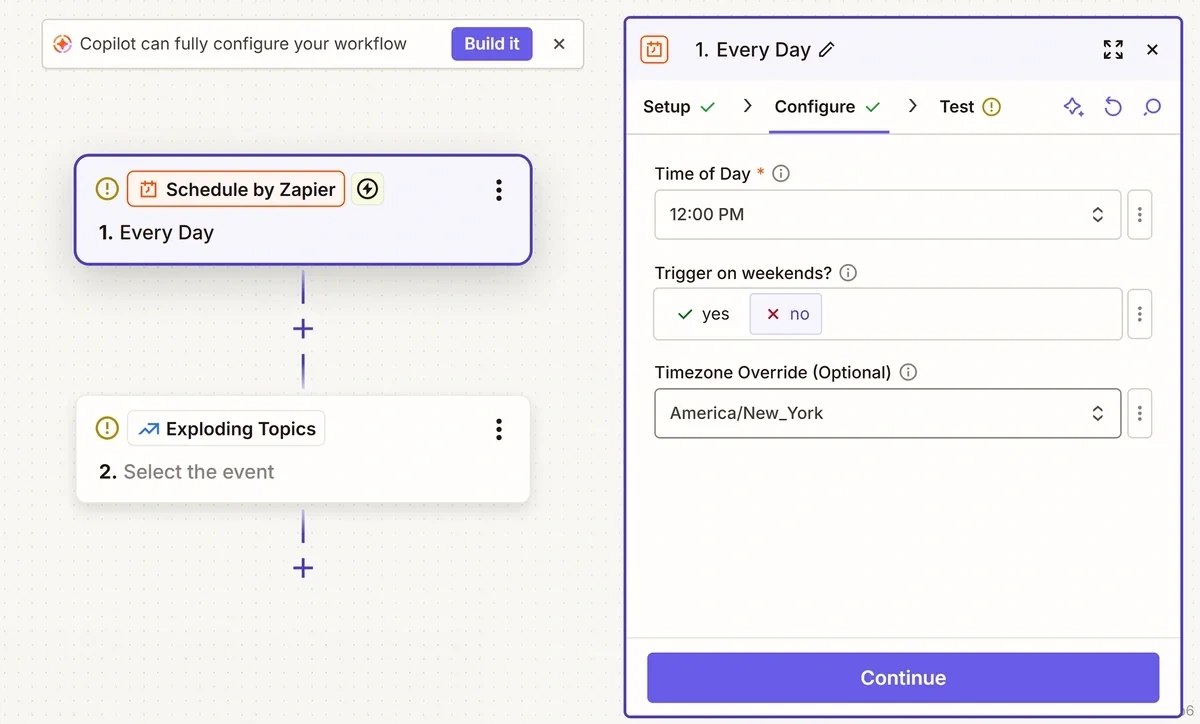
Then click Continue again. In the next panel, Zapier will offer to test your schedule to make sure it’s working.
I recommend always using the tests for each step of your workflow along the way. It’s easier to troubleshoot early than to have to wade back through multiple layers of your automation to fix things later.
Click Test trigger to run the test.
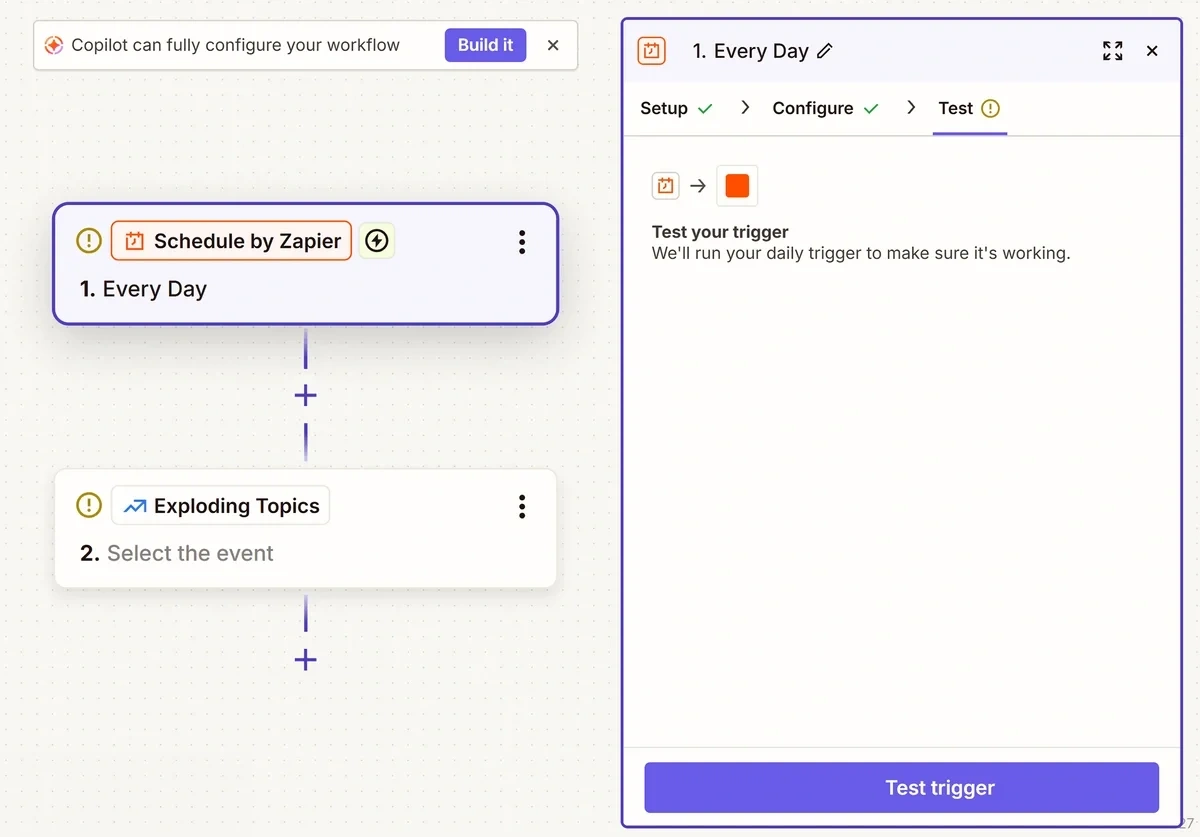
If everything is working right so far, Zapier should show you a schedule record for the current date. Click Continue with selected record to use this test data in subsequent testing for your workflow.
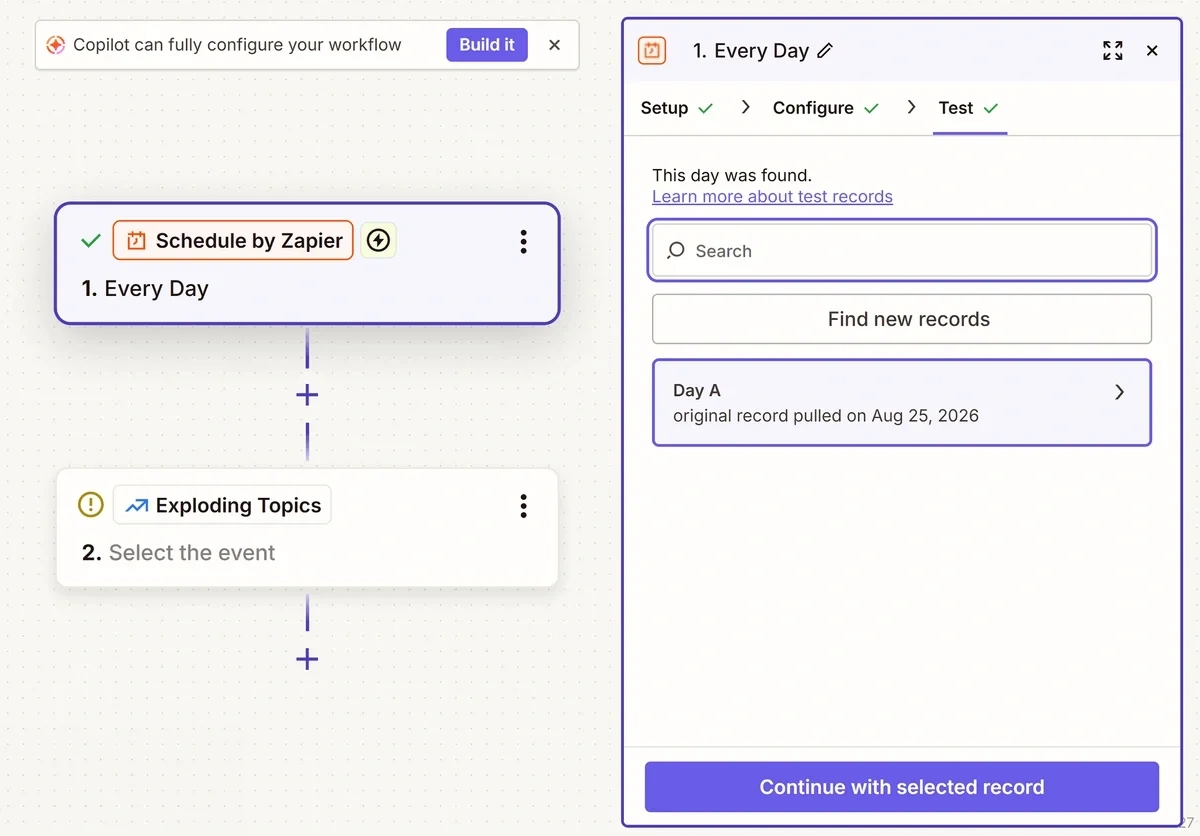
Step 3: Create Your Exploding Topics Action Event
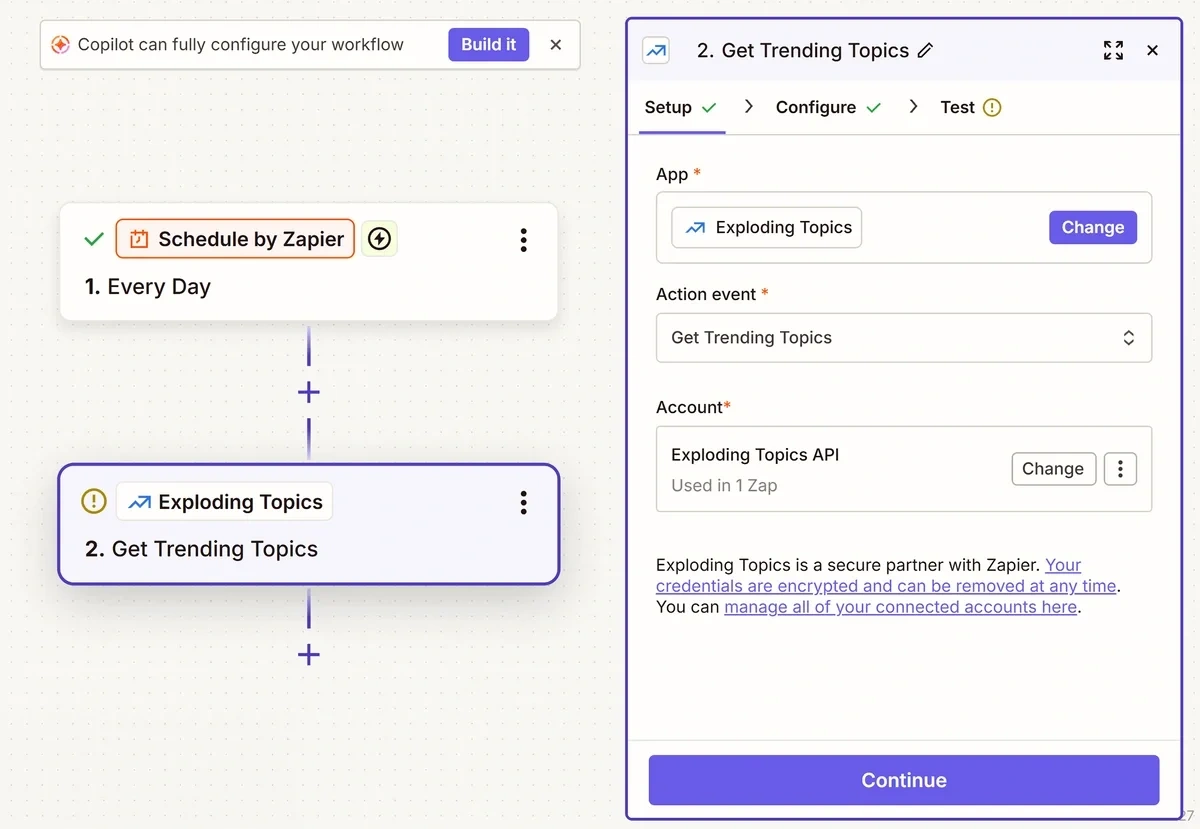
After your workflow has passed its first test, Zapier will automatically open the configuration panel for the action event. This is where you’ll set up your Exploding Topics connection and set the criteria Zapier will use to determine which topics to send to your content calendar in Asana.
From the Action event dropdown, select the type of trend for which you want to create content. I’ll be using Get Trending Topics to cast a wider net, but you could use Get Products, Get Startups, Get Meta Trends, or Search Topics Database to collect different types of trends or trends related to a specific keyword.
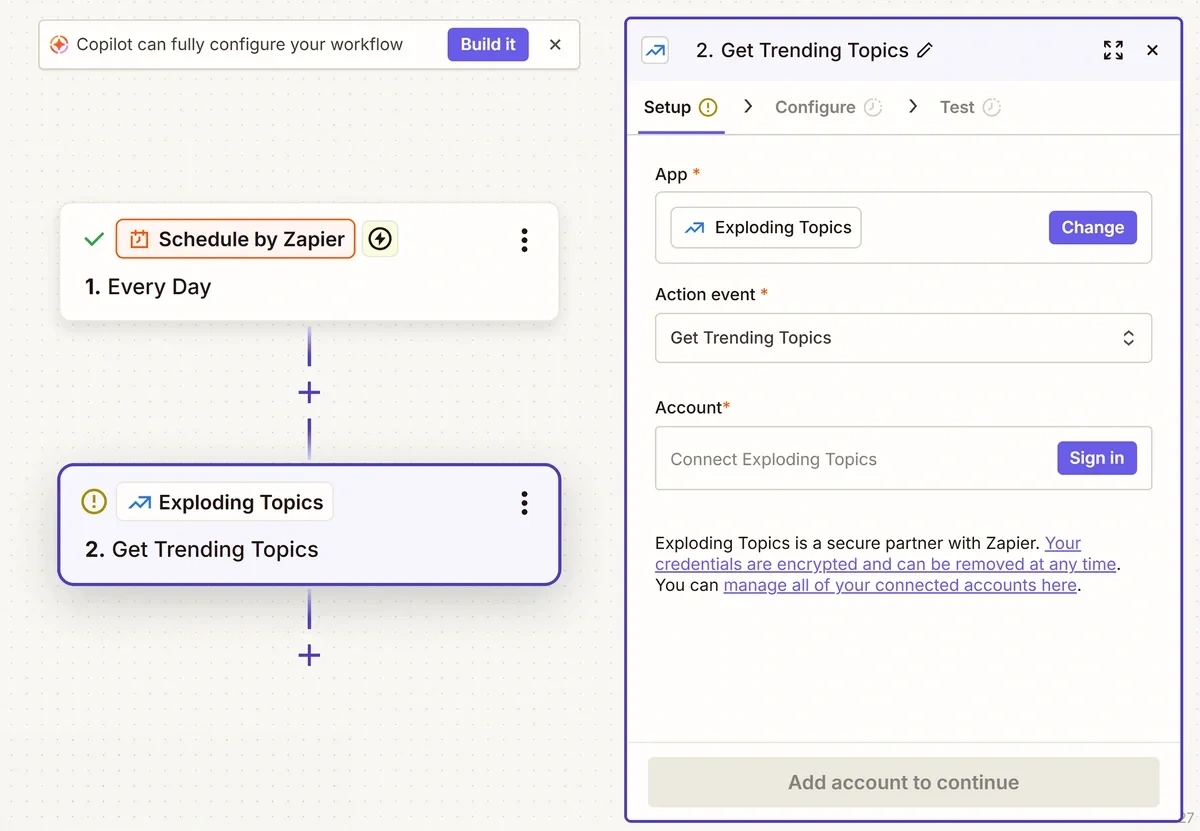
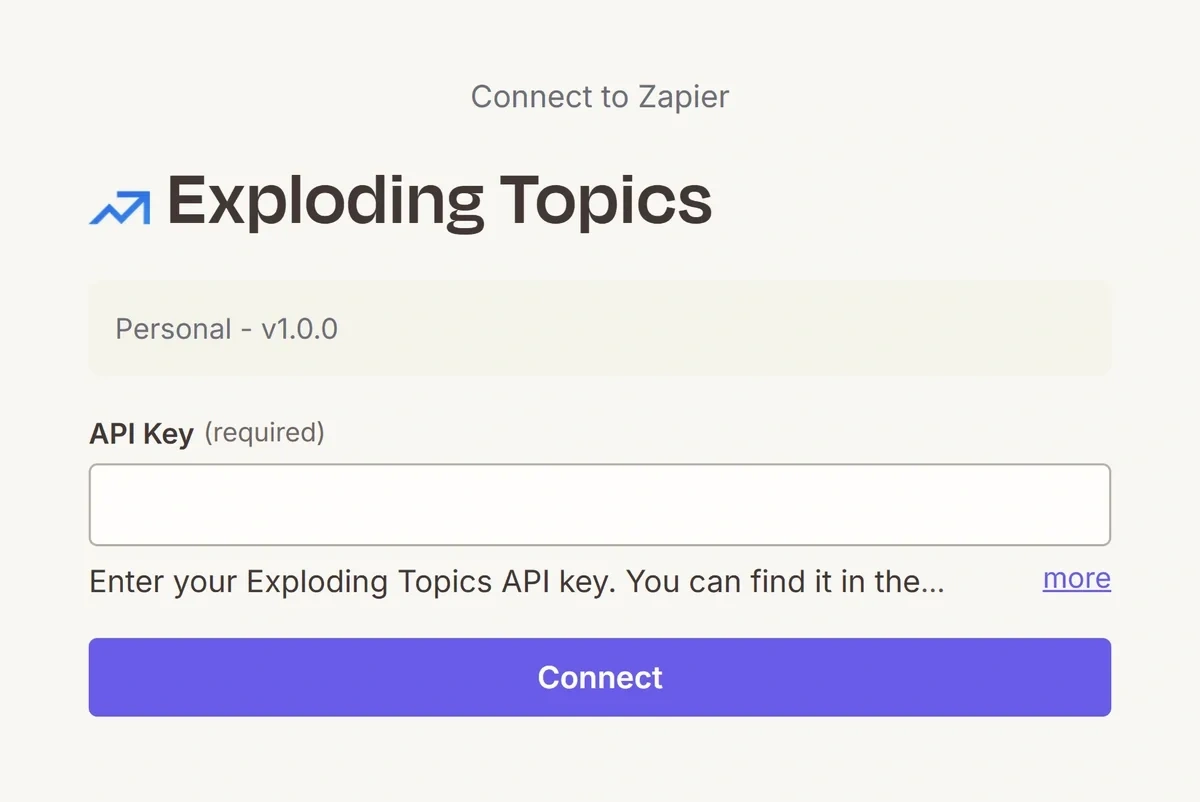
Next, click on the Sign in button in the Account field. This will open a popup window where you need to enter your Exploding Topics API key.
You can retrieve your API key in the Exploding Topics app by going to the API Access tab.
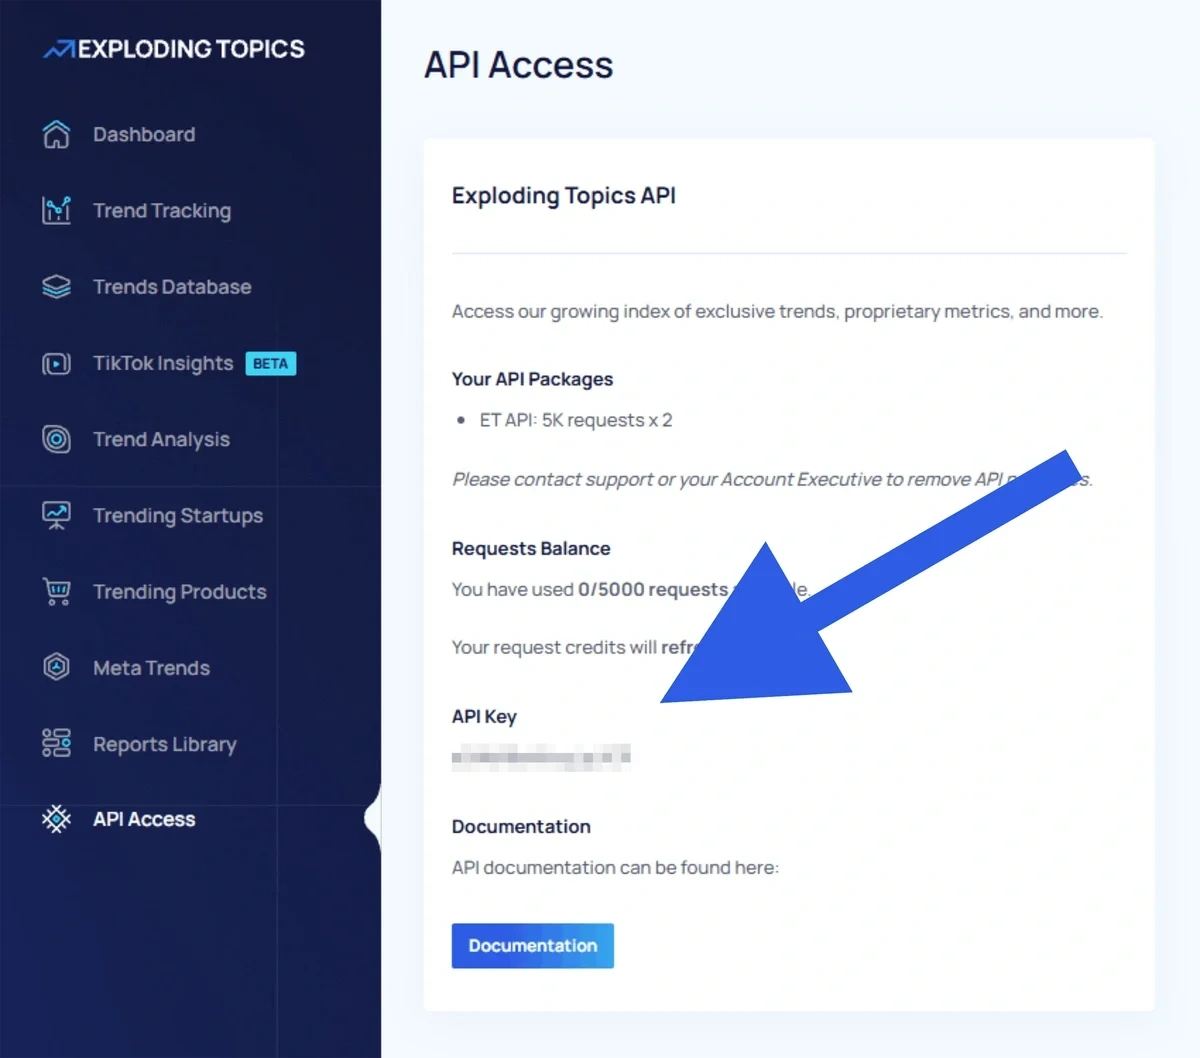
Copy your API key and paste it into the Zapier popup window. Then click Connect. Once the connection is complete, click Continue in the workflow builder configuration panel.
Next you’ll set your Exploding Topics filters. These will vary a bit depending on which action event you chose.
For my workflow, I’ve set the filters to retrieve exploding topics in the marketing category from the past six months. It will return ten results each time it runs, pulling the top trends by growth.
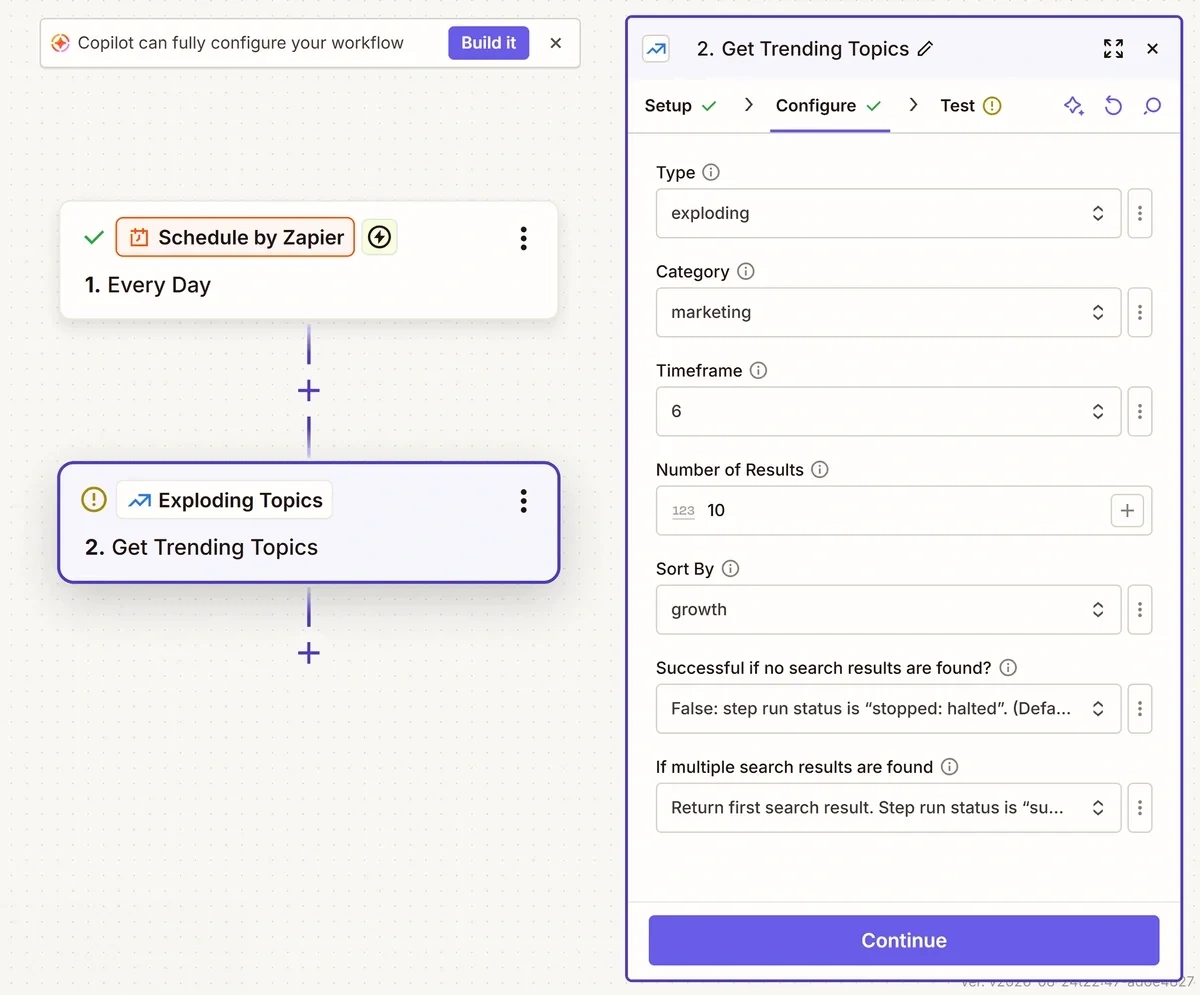
The last two settings I recommend leaving in their default states. The first ensures the workflow always returns results, and the second enables the workflow to retrieve multiple topics at once instead of stopping after the first trend is found.
Finally, you will have another chance to test your workflow to make sure everything is working properly. This test is especially important because it will check that Exploding Topics has connected to Zapier correctly.
Click Test step.
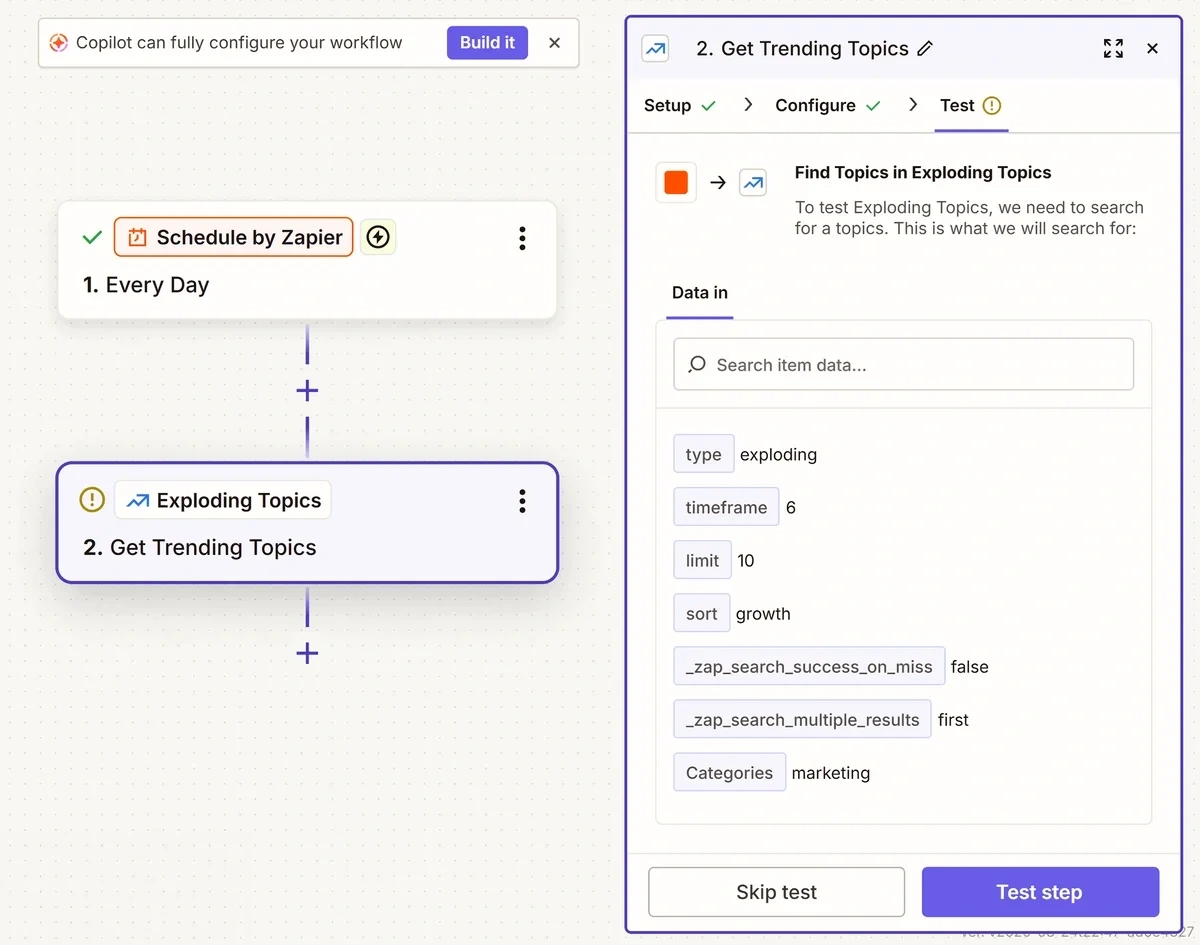
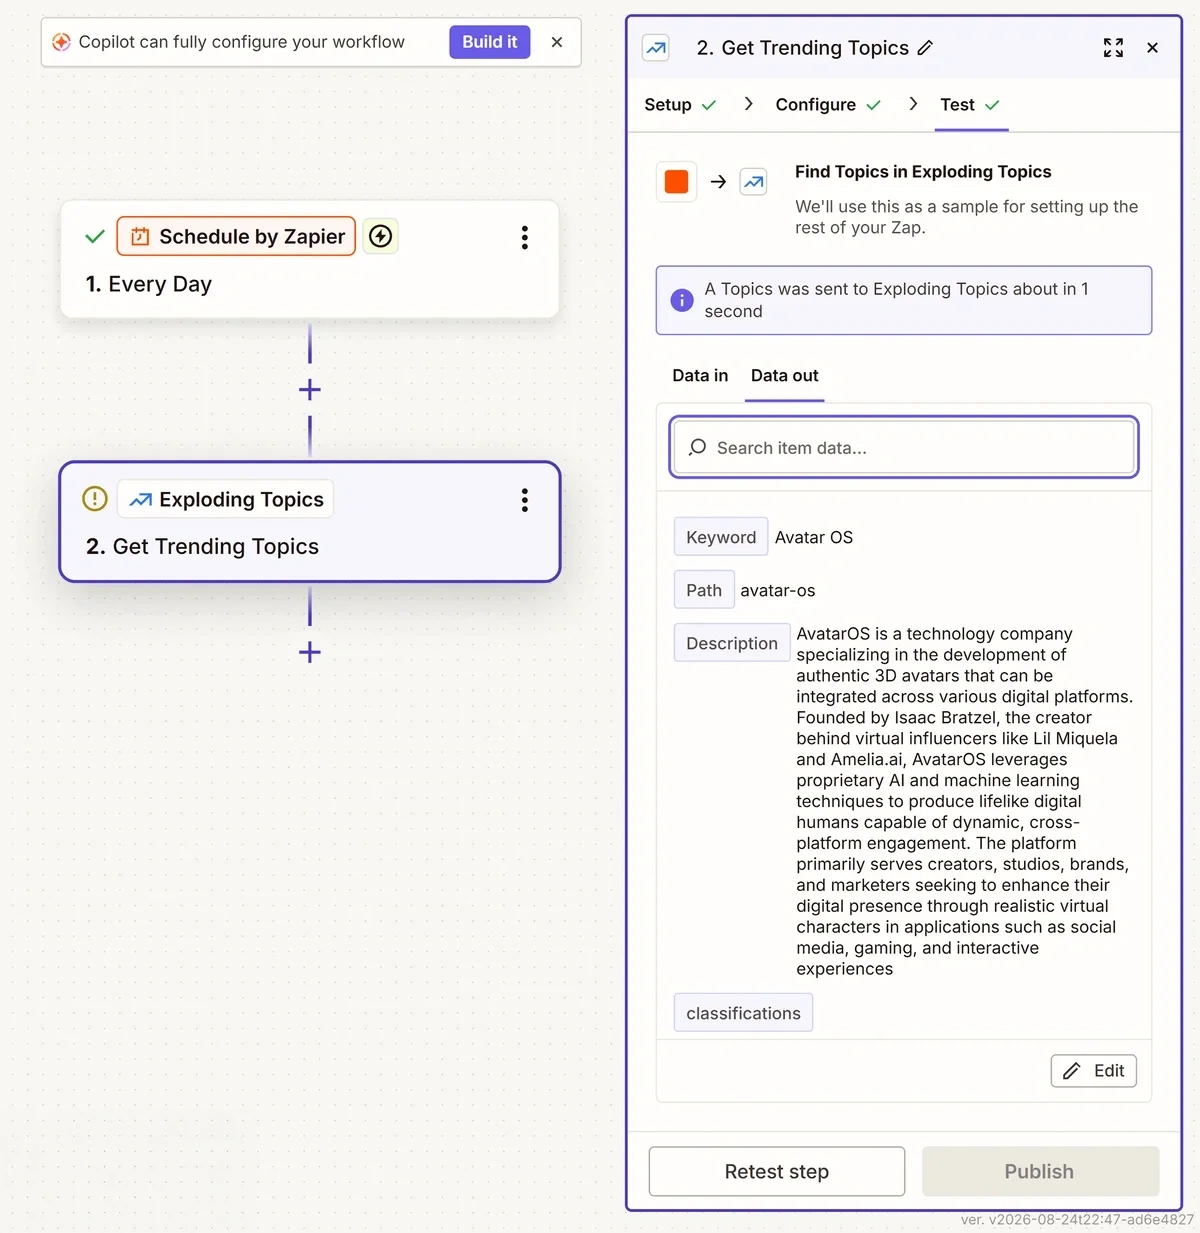
If the test is successful, you’ll see a topic and its data in the configuration panel.
Build a winning strategy
Get a complete view of your competitors to anticipate trends and lead your market
Step 4: Configure Your Zapier Action to Create a New Task in Your Content Calendar Project
You’re halfway to a complete content idea generating workflow. Next you need to set up your Asana connection and turn the Exploding Topics data Zapier retrieved into tasks in your content calendar project.
Click the plus (+) below the Exploding Topics action event in the workflow builder to add another action.
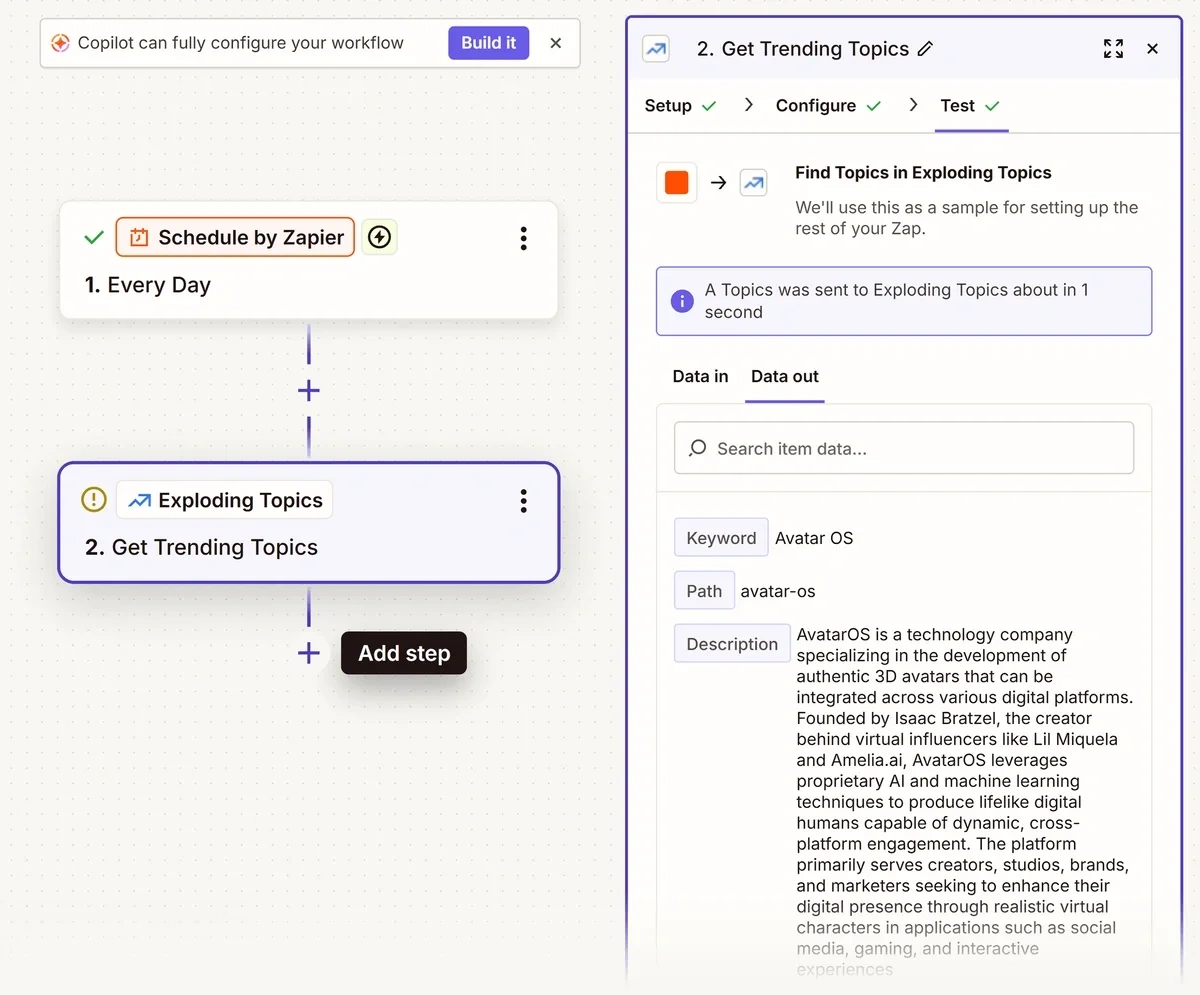
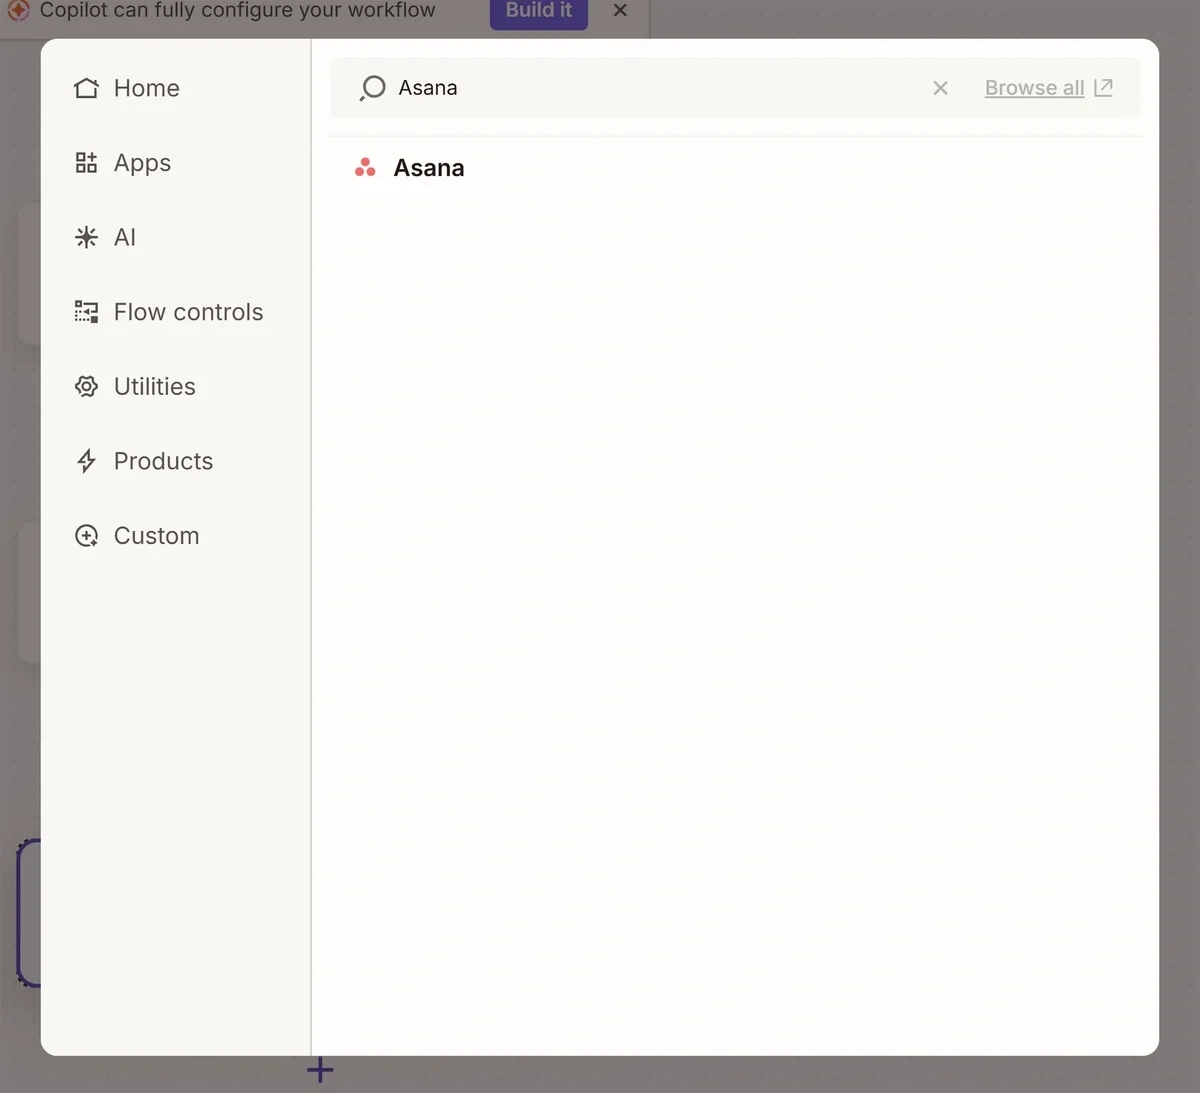
Then search for and select Asana in the app library.
The configuration panel should open right away. From the Action event dropdown, select one of the following options:
- Create Task if you’re using the free version of Asana, or if you skipped setting up a task template in Step 1.
- Create Task from Template if you’re using a task template created specifically for content ideas.
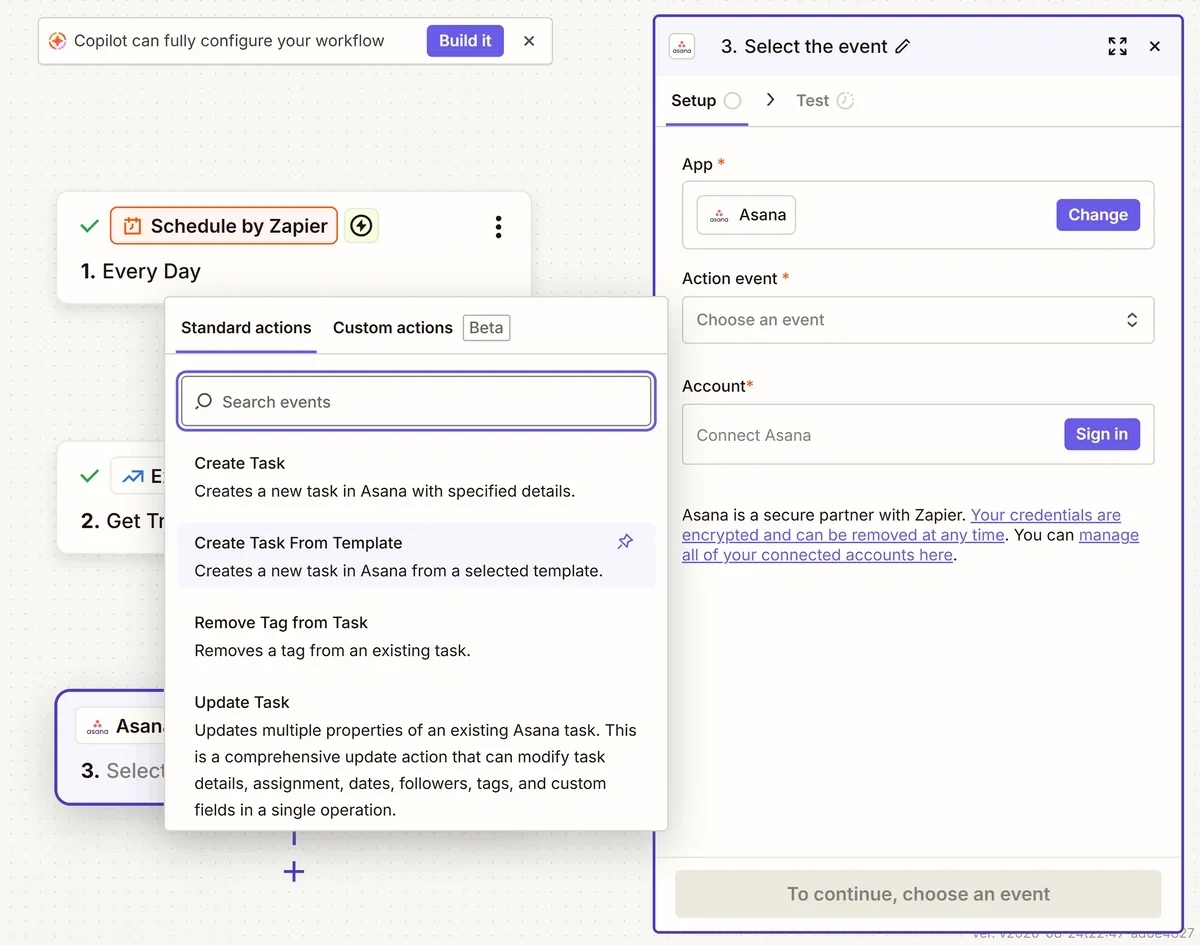
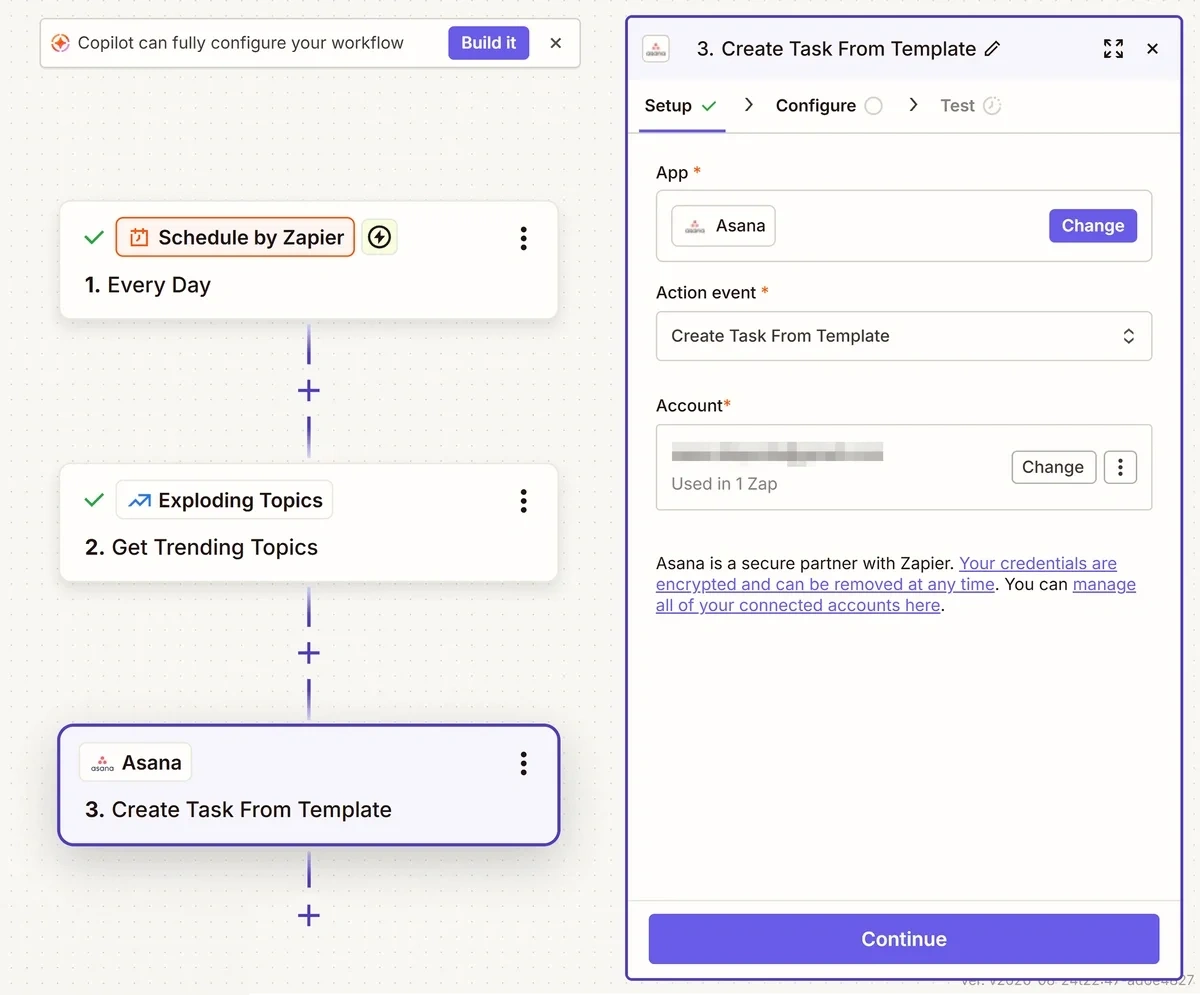
Then click the Sign in button in the Account field. This will open a popup window where you can log in to your Asana account. Click Continue to proceed.
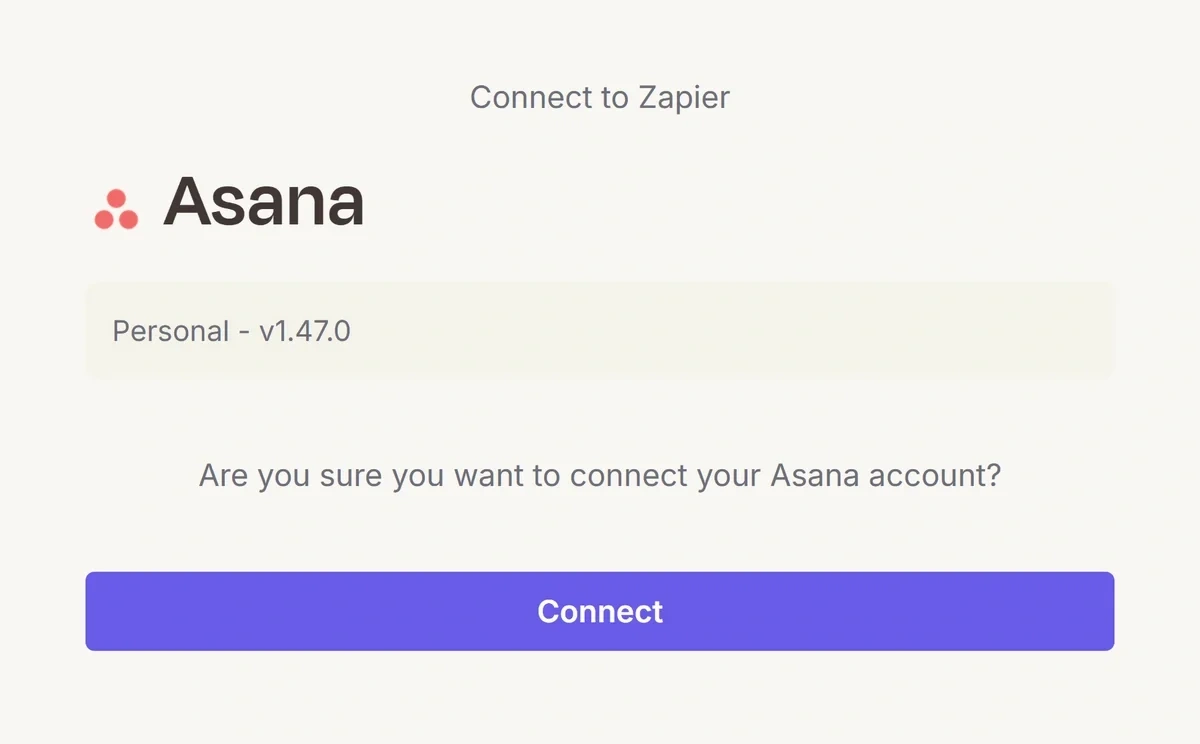
Enter your Asana login credentials and grant Zapier permission to access your account. Once the popup window closes, click Continue in the configuration panel.
Now configure your Asana connection. Set the dropdowns like so:
- Workspace: The Asana workspace that includes your content calendar project
- Project: Your content calendar project
- Task Template: The content task template you created in Step 1
- Task Name: Select the topic path from the available Exploding Topics data
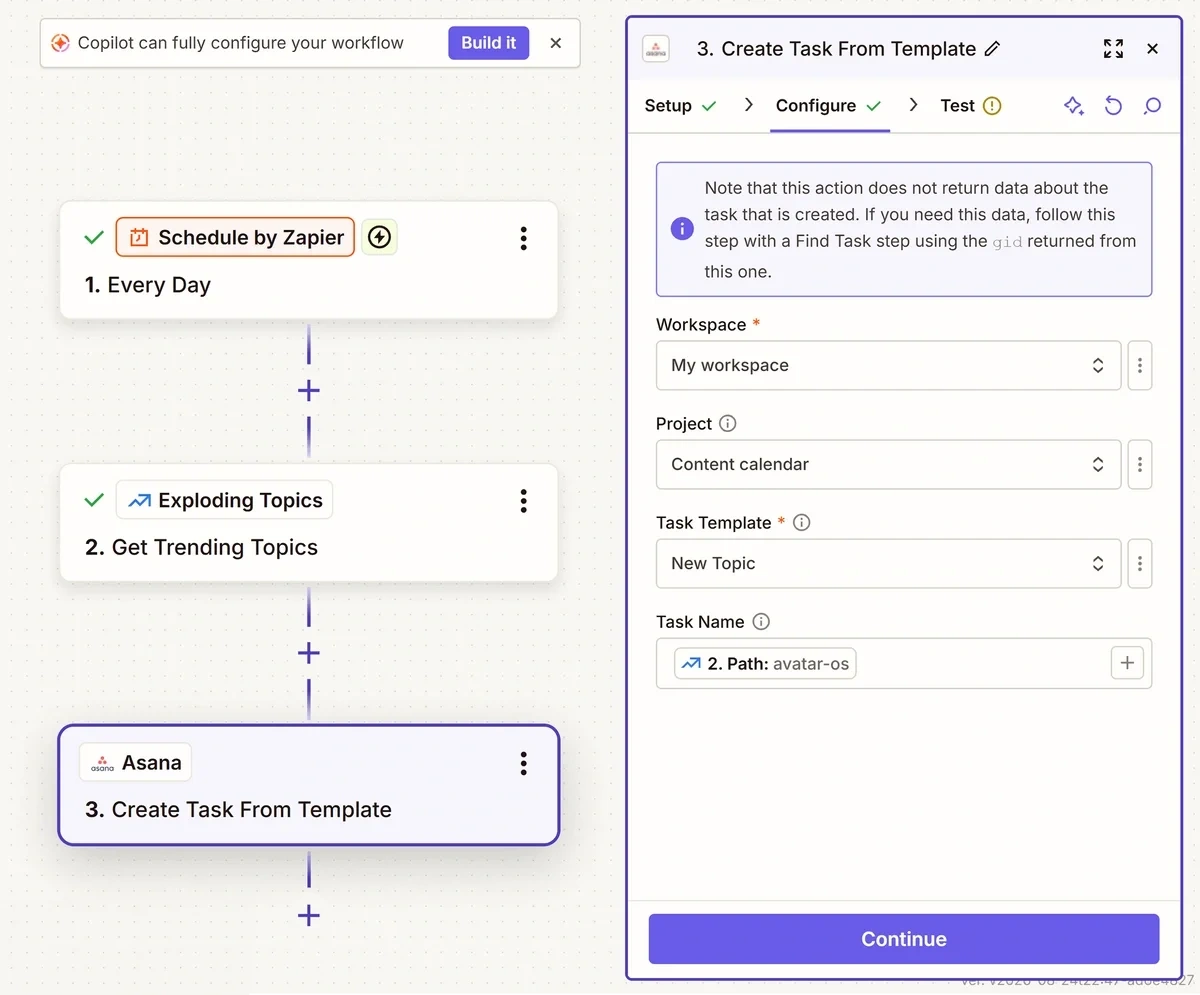
Then click Continue again.
It’s time for your last Zapier test. Click Test step to make sure your Asana connection is working properly.
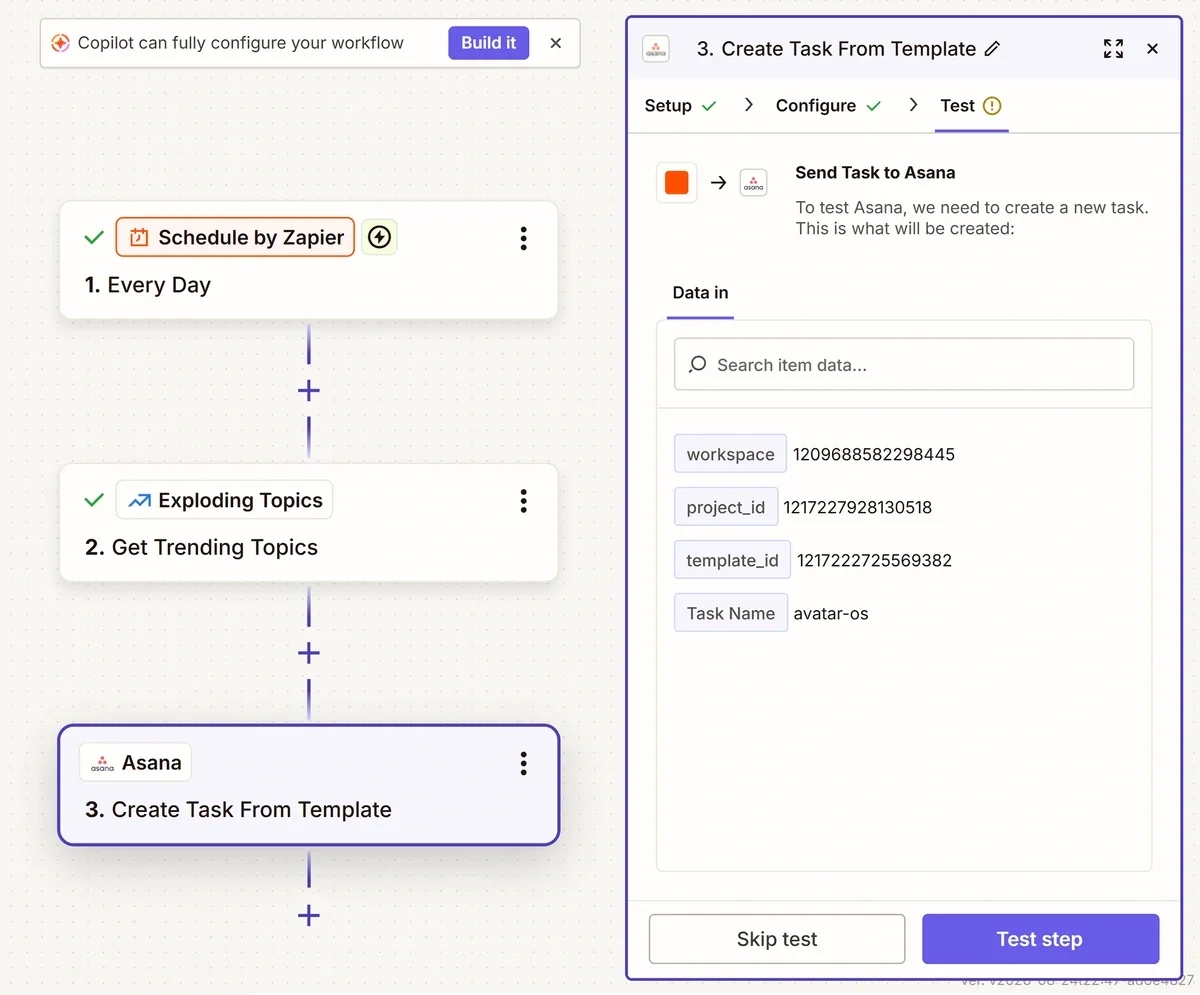
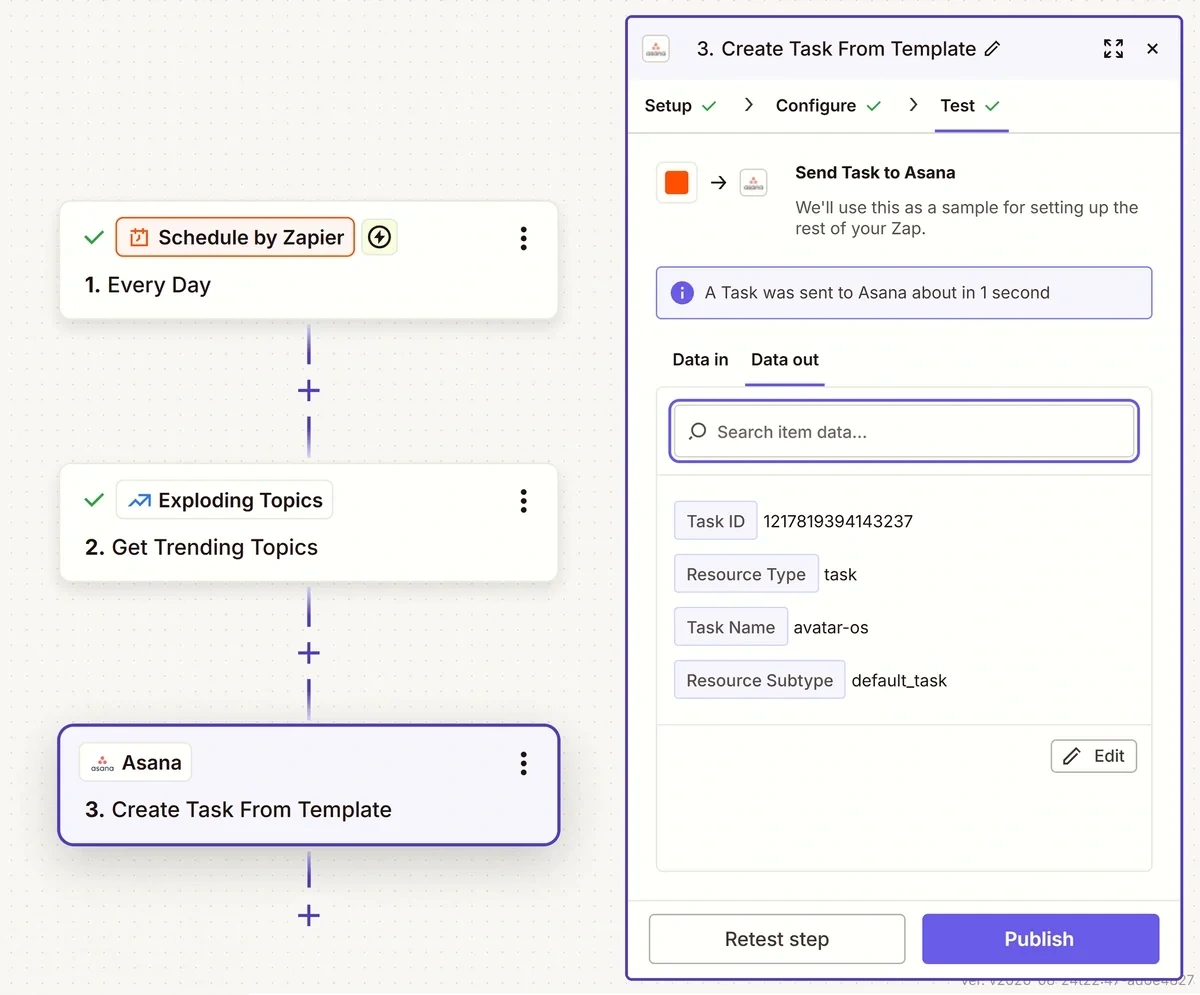
If everything is working properly, you’ll see a success message in the configuration panel.
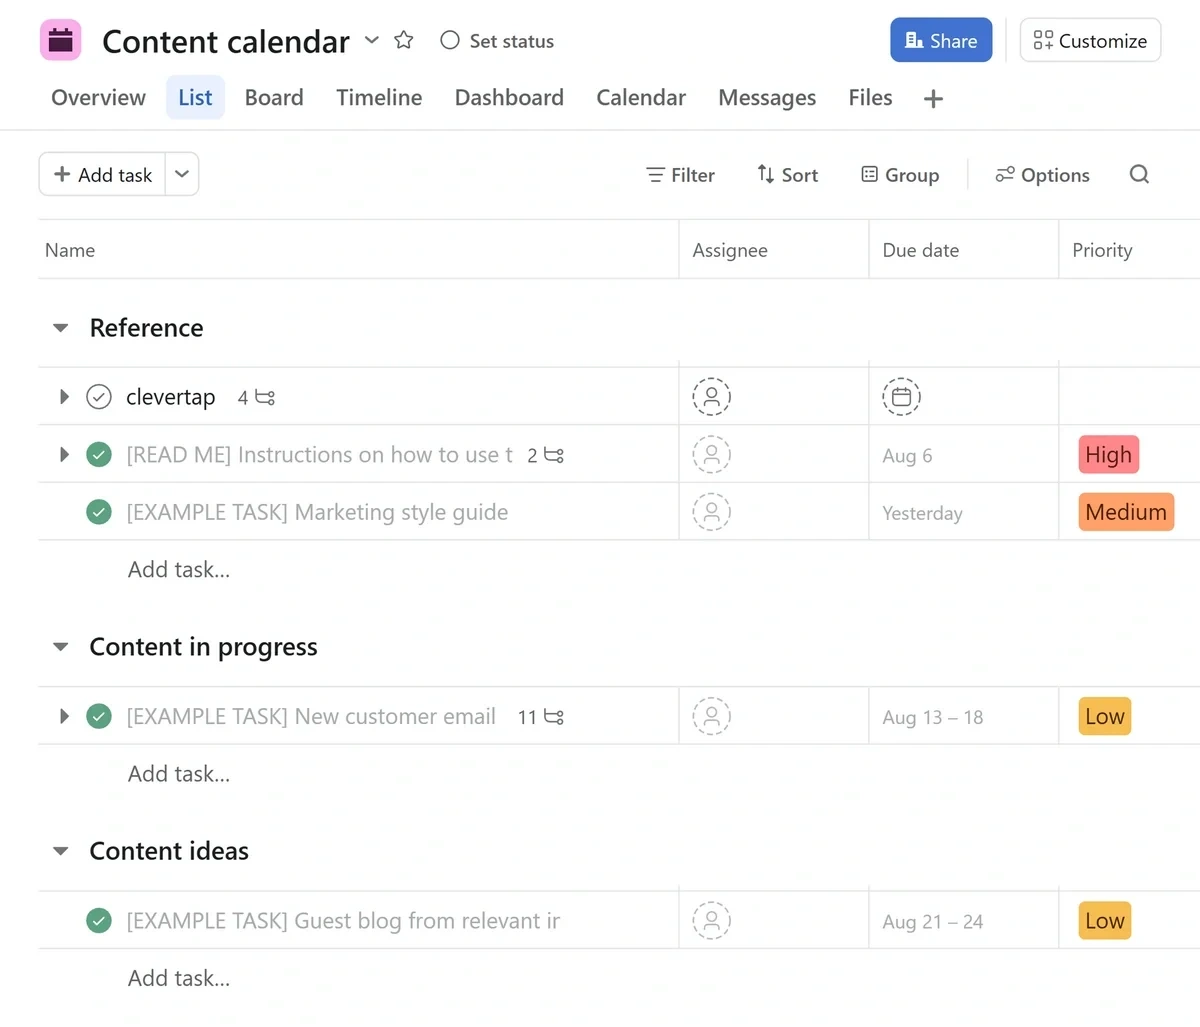
You’ll also find a test task in your Asana project under the name of the trend Zapier pulled from Exploding Topics.
Move Auto-Generated Content Ideas to a Specific Section of Your Asana Project
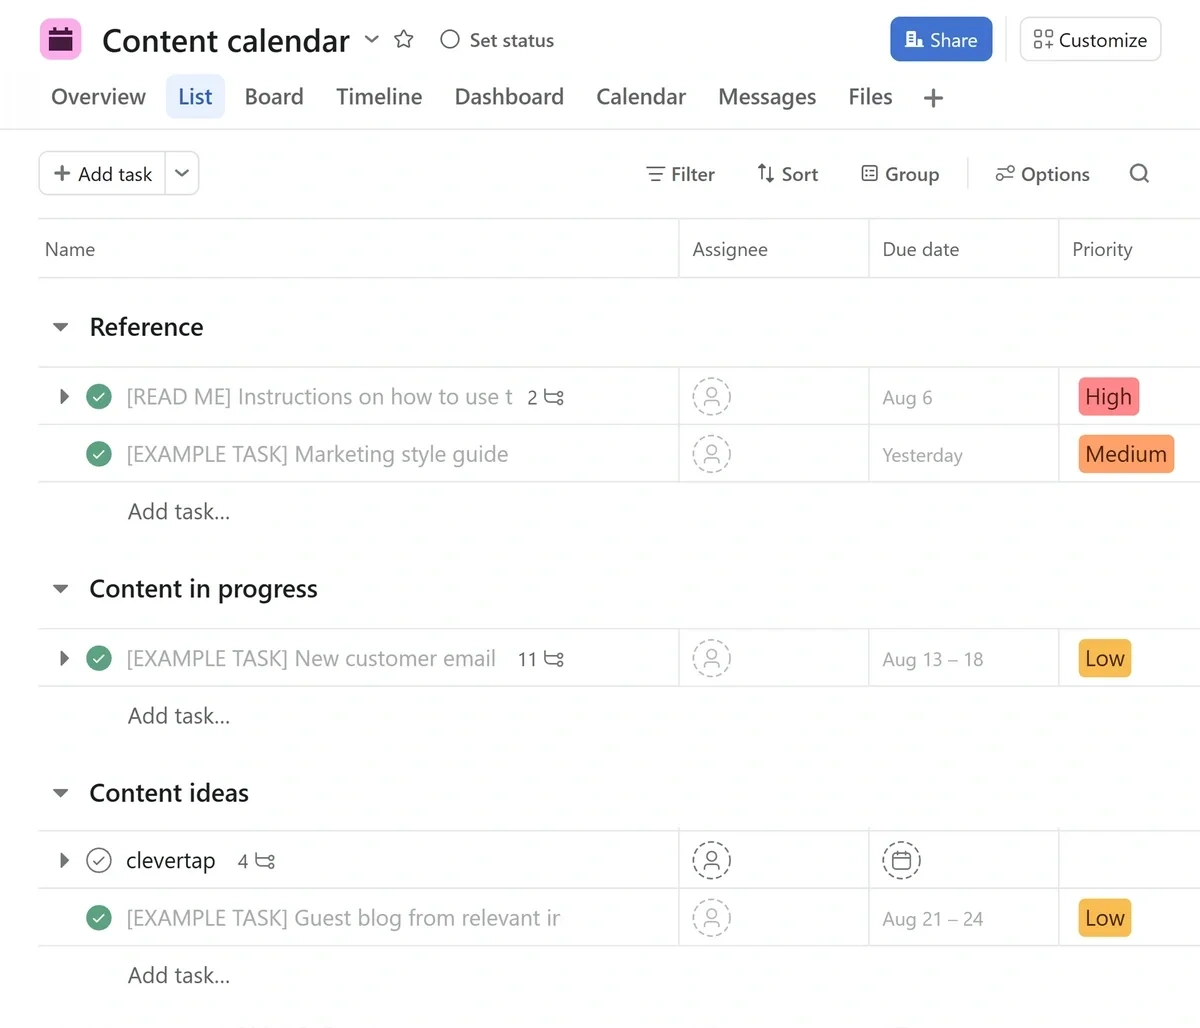
As you can see in my screenshot above, my auto-generated content task ended up in a section of my content calendar project titled “Reference” instead of the “Content Ideas” section.
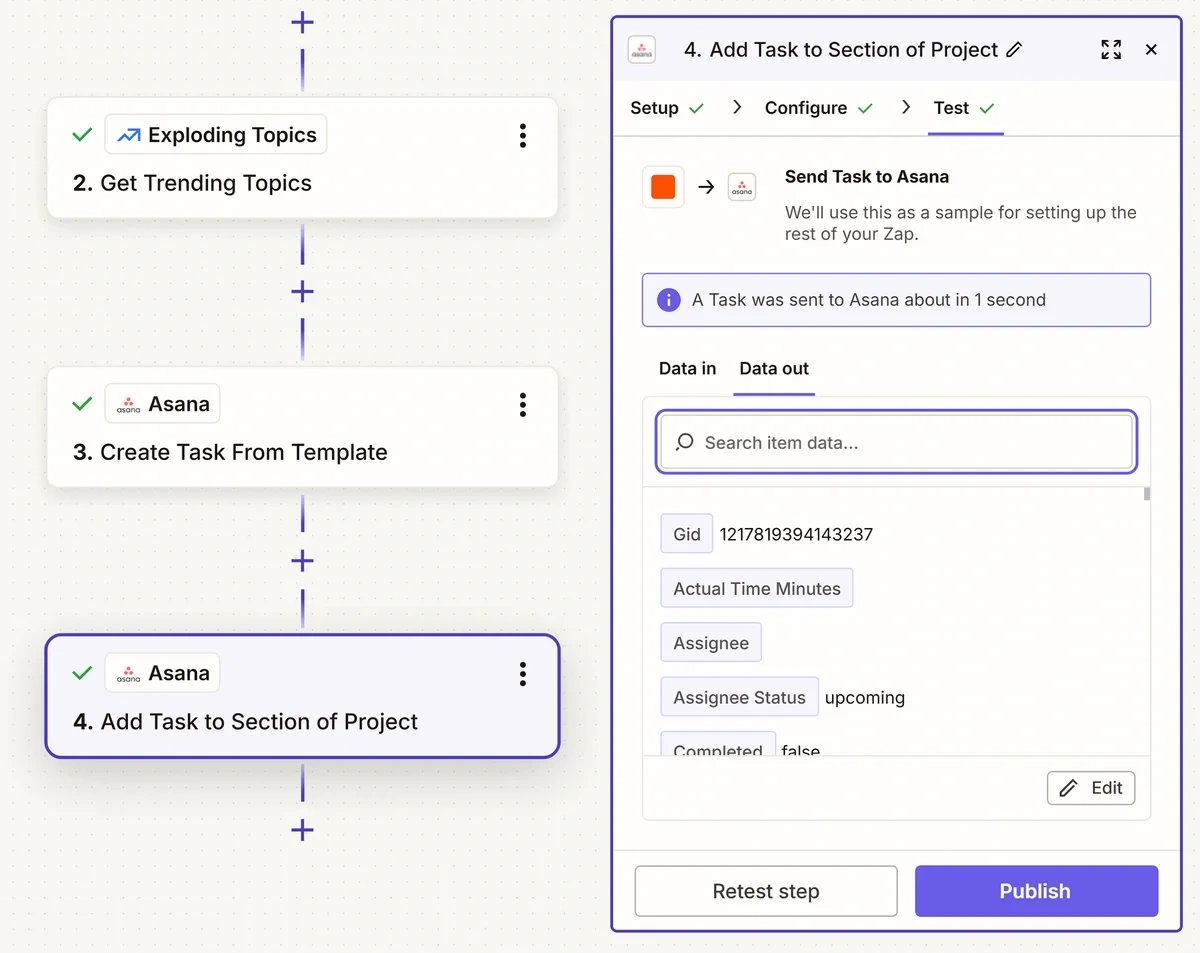
If your content calendar also uses sections to organize tasks, you can move your auto-generated tasks by adding another step to your Zapier workflow and using the Add Task to Section of Project action event.
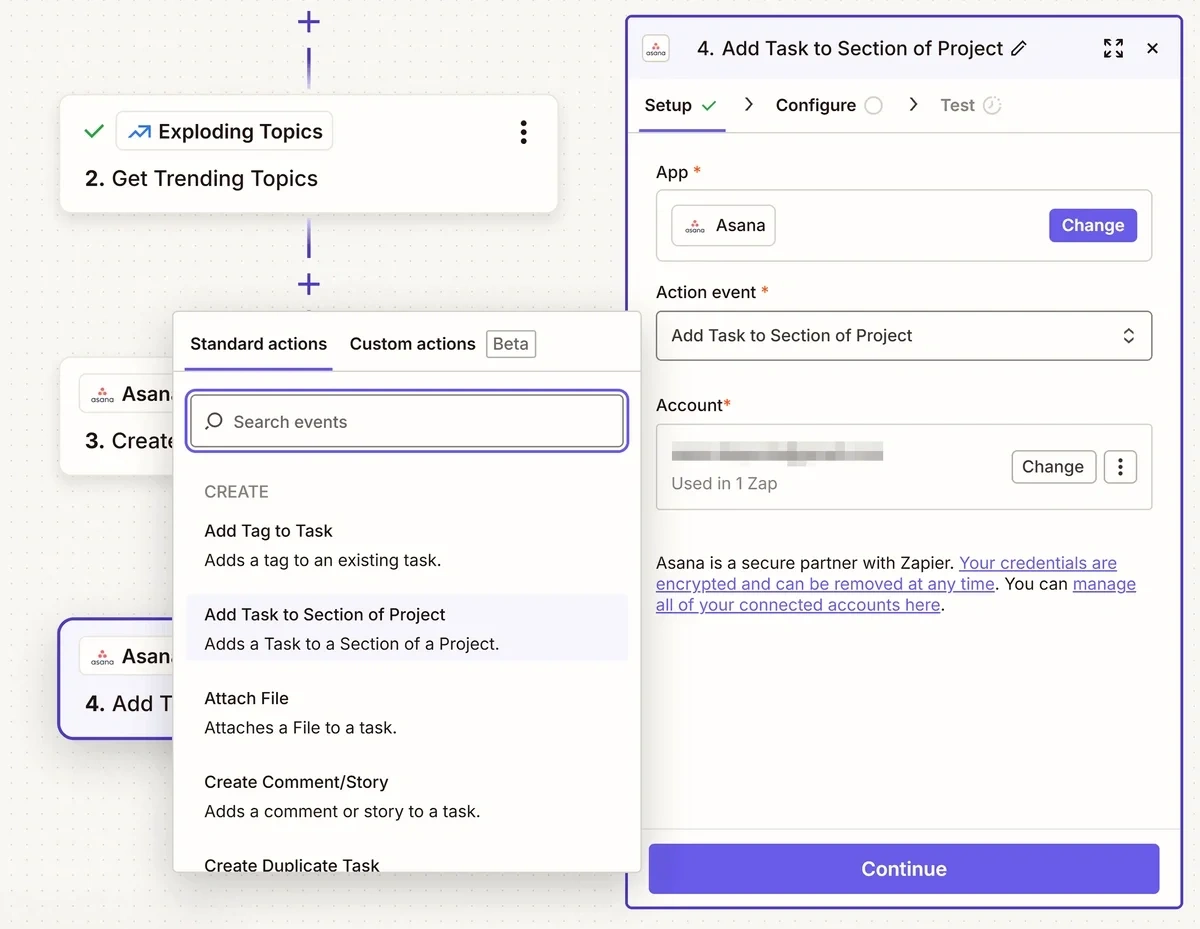
When configuring this step, make sure to select Custom in the Task ID field, then select the task ID for the test task created in the previous step.
When you test this step of your workflow, your test task should move to the selected section.
When you’re happy with your workflow, click Publish to go live and start collecting content ideas from Exploding Topics in your Asana content calendar.
Step 5: Review and Assign Content Tasks
Once your Zapier workflow starts running, you’ll have ten auto-generated content ideas added to your Asana project every day. You’ll still need to do a little bit of manual work to get them ready to write, though.
For starters, I recommend looking the trend up in the Exploding Topics Database.
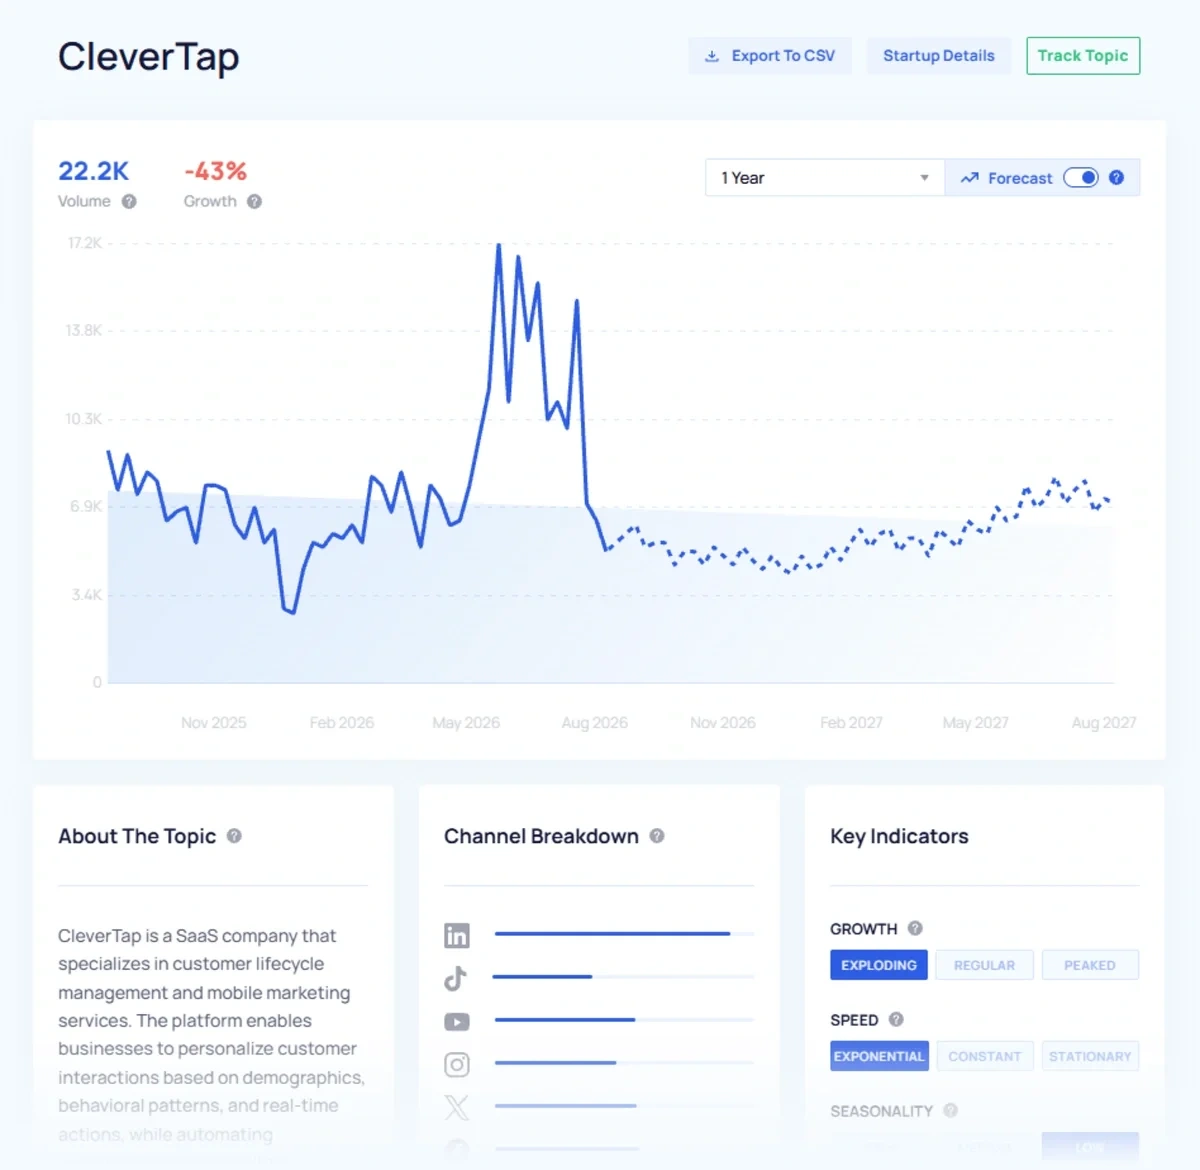
You can learn more about the topic, see its growth forecast, and find related topics—all of which will help you determine if this trend is worth writing about right now.
You should also back up your decision with keyword data from Semrush.
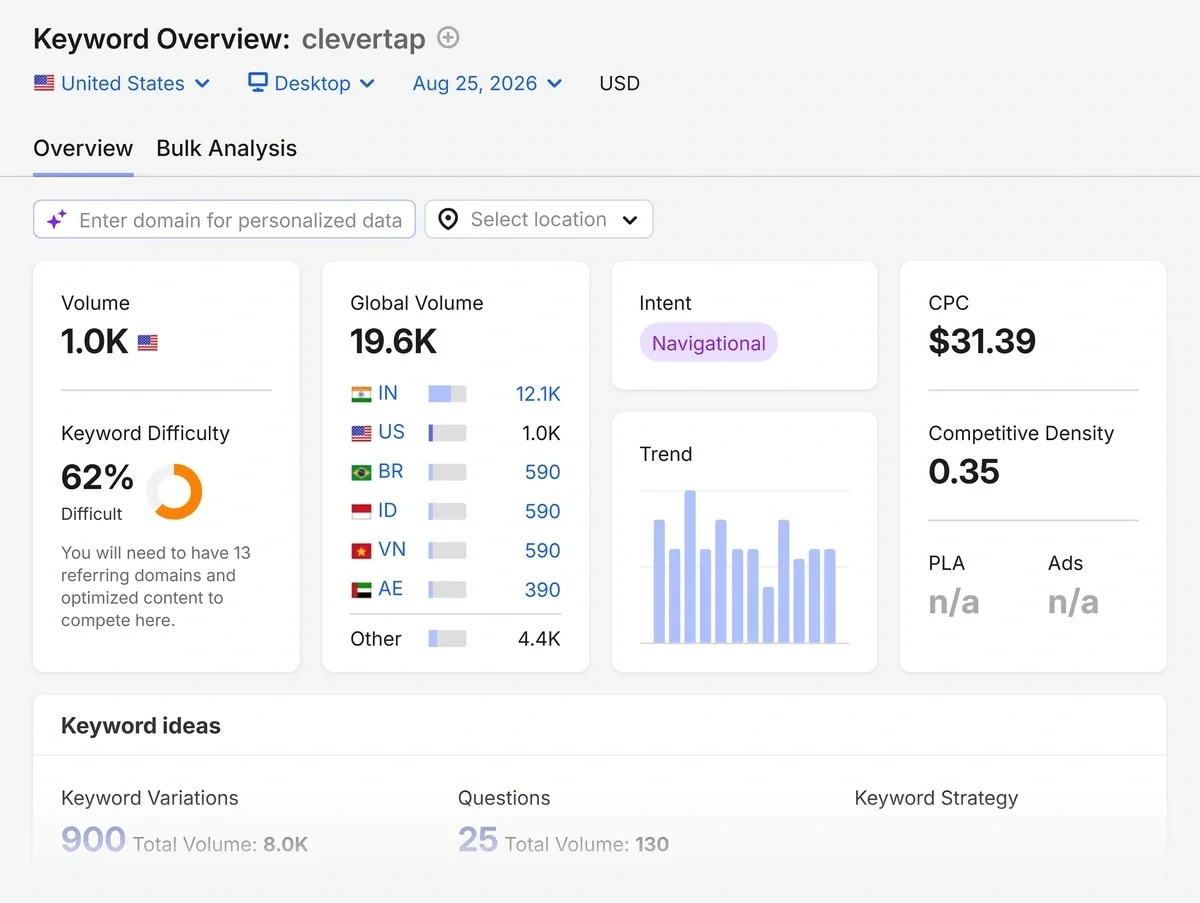
The Keyword Overview tool will provide you with information like the keyword difficulty, longtail keyword variations, and search intent.
The metrics I would focus on most are:
- How close the topic appears to be to peak growth in Exploding Topics and whether you can publish content about it before its forecasted peak date
- How competitive the keyword is (its keyword difficulty)
The most worthwhile topics are the ones you can capitalize on while they’re still gaining momentum and easily rank for.
Once you’ve determined whether or not you want to publish content on an auto-generated topic, you can either mark it as complete in Asana or assign it to a writer and add a due date.
Never Miss a Trend With Exploding Topics + Zapier
Sending trending topics from Exploding Topics to Asana with Zapier eliminates steps in the brainstorming process while still relying on data to find prospective content ideas.
You can easily adapt this same workflow to collect ideas for product development, find new startups for competitor analysis, and more.
It all starts with gaining access to the Exploding Topics Pro API. Test it out with a seven-day free trial!
Stop Guessing, Start Growing 🚀
Use real-time topic data to create content that resonates and brings results.
Exploding Topics is owned by Semrush. Our mission is to provide accurate data and expert insights on emerging trends. Unless otherwise noted, this page’s content was written by either an employee or a paid contractor of Semrush Inc.
Share
Newsletter Signup
By clicking “Subscribe” you agree to Semrush Privacy Policy and consent to Semrush using your contact data for newsletter purposes
Written By


Molly is a technical content writer with a passion for making technology easy for anyone to understand. She specializes in content... Read more